A Fun Alternative Idea for those Pocket Inserts in your Paper Pumpkin Kit: May 2022
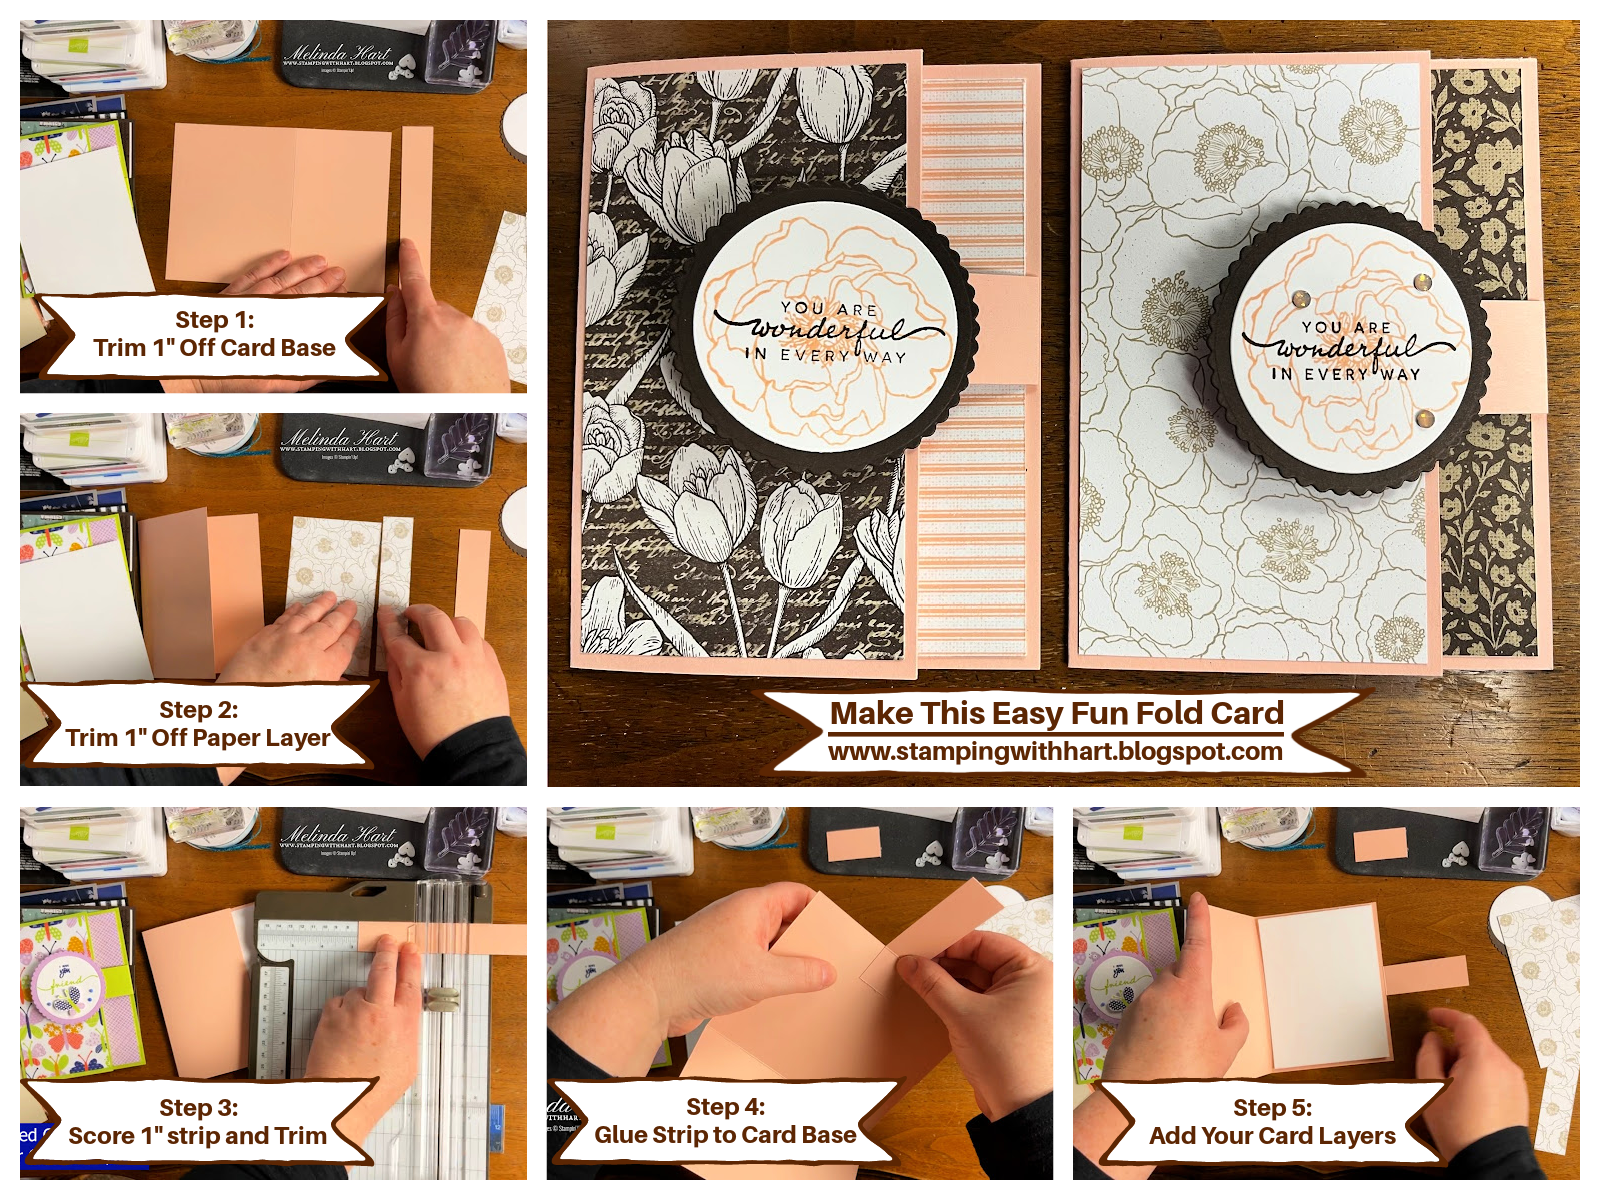
CARD MEASUREMENTS
Card Base: 5-1/2 x 8-1/2 score: 4-1/4" (Basic White Thick)
Layer 1: Stitched Rectangle Die 4 x 5-1/4" (Plaid 2022-2024 Designer Paper in Each Color)
Layer 2: The Pocket Insert from May 2022 Paper Pumpkin Kit (All 5 Colors, 10 pieces in Kit)
Layer 3: Basic White Sentiment Piece - Stitched Rectangle Die Size: 1-7/8 x 3-1/4"
Layer 4: (optional) #1 Die Cut from Your Biggest Fan Bundle
Embellishments: 5 Brads or Use the Embellishments from Paper Pumpkin Kit
This alternative card features elements of the May 2022 Paper Pumpkin Kit but it also uses product from our Annual and Mini Catalogs. I have a full product list below that you can click and shop if you like.
I know Father's Day is around the corner! On my Facebook Live, Marian said this is a "grandpa" shirt card and boy was she right! So, I dug up this picture taken by my mom, Virginia, eons ago of me with my Pap. This was his plaid shirt. He wore it for 20 years. That is not an exaggeration! Not everyday, of course, but it was a staple in his closet. Every time I look at this card I think of him fondly.
Image (copyright) Virginia Hart My Pap and I in the 1980's His plaid shirt!
Sweet Sorbet
Orchid Oasis
Parakeet Party
Starry Sky
Tahitian Tide
I hope you enjoyed today's alternate card idea! Happy Crafting!
Have a safe Memorial Day Weekend and for those of you remembering loved ones, my thoughts are with you.
For those brave men and women who made the ultimate sacrifice for our freedom, thank you. I know those words are not enough but I am so grateful. You are in my thoughts this Memorial Day.
Abigail Rose Designer Series Paper Petal Pink and Early Espresso Cardstock and Ink Happiness Abounds Stamp Set
21 cards using this easy fun fold layout! I have to give due credit to two fellow demonstrators, the first is Roberta Timmons who very kindly shared her Paper Share with me from the Annual Catalog. It was so generous of her and I know how much time and effort she put into it.
The other demonstrator is Karen Titus. I have never met her but I was inspired by her card layout and wanted to be sure I gave proper credit!
Before I get into the tutorial I want to be sure you know we have one week left for the In Color Starter Kit. There is an incredible savings on this kit! $66.50 in FREE In Color product in addition to the regular Starter Kit savings.
Total Kit Value: $191.50 You pay: $99 FREE SHIPPING!
You choose $125.00 in products. You pay $99.00. In May, you also get:
-2022-2024 In Color Ink Pads
-2022-2024 In Color Cardstock
-2022-2024 In Color Designer Series Paper
-2022-2024 In Color Grid Paper
Here are the cards using the various Designer Series Papers from the 2022-2023 Annual Catalog from Stampin' Up! NOTE: Does not include the Color Collections DSP.
Awash in Beauty Designer Series Paper Merry Merlot and Old Olive Cardstock Cup of Tea and Happiness Abounds Stamp Sets
HOW TO MAKE THE CARD:
Card Base: 5-1/2 x 8-1/2 scored by 4-1/4"
Trim off 1 inch from the card base - You will now have 1 x 5-1/2" piece
Cut Designer Series Paper to 4 x 5-1/4"
Trim off 1"
Score the 1 inch cardstock piece at 2-3/4" Trim down one side
Adhere tab to card base
Cover tab with the Basic White Cardstock Piece - Cut at 4 x 5-1/4"
Add your designer series paper and stamp your desired sentiment on Layered Circle. Finish assembling card.
Butterfly Kisses Designer Series Paper Parakeet Party and Fresh Freesia Cardstock Starry Sky and Parakeet Party Ink
Forest Friends Designer Series Paper Calypso Coral and Old Olive Cardstock and Ink
He's the Man Designer Series Paper Early Espresso and Basic White Cardstock and Ink Beauty of Friendship and Mountain Air Stamp Sets
Perfectly Penciled Designer Series Paper Basic Black and Basic White Cardstock Happiness Abounds and Beauty of Friendship Stamp Sets
Pretty Prints Designer Series Paper Soft Seafoam and Basic White Cardstock Cup of Tea Stamp Set
Sun Prints Designer Series Paper Gray Granite and Basic White Cardstock Cup of Tea Stamp Set and Starry Sky Ink
Hues of Happiness Designer Series Paper Daffodil Delight Cardstock
Lovely in Linen Designer Series Paper Pale Papaya and Basic White Cardstock Cup of Tea Stamp Set and Sweet Sorbet Ink
Tea Boutique Designer Series Paper Orchid Oasis and Sweet Sorbet Cardstock Cup of Tea Stamp Set and Orchid Oasis Ink
Texture Chic Designer Series Paper Petal Pink Cardstock and Gold Foil Sheet Hello Beautiful Stamp Set with Soft Succulent and Petal Pink Ink
Design a Daydream HOST Designer Series Paper Blackberry Bliss and Basic White Cardstock Happiness Abounds Stamp Set and Blackberry Bliss Ink
I hope you enjoyed today's tutorial. The products listed below include my Host Code which expires on May 31, 2022. When you spend $50 or more (before tax) you will receive a FREE embellishment from me. Happy Shopping and Happy Crafting!
Now let's talk about the May Paper Pumpkin Kit: Celebrating In Color...
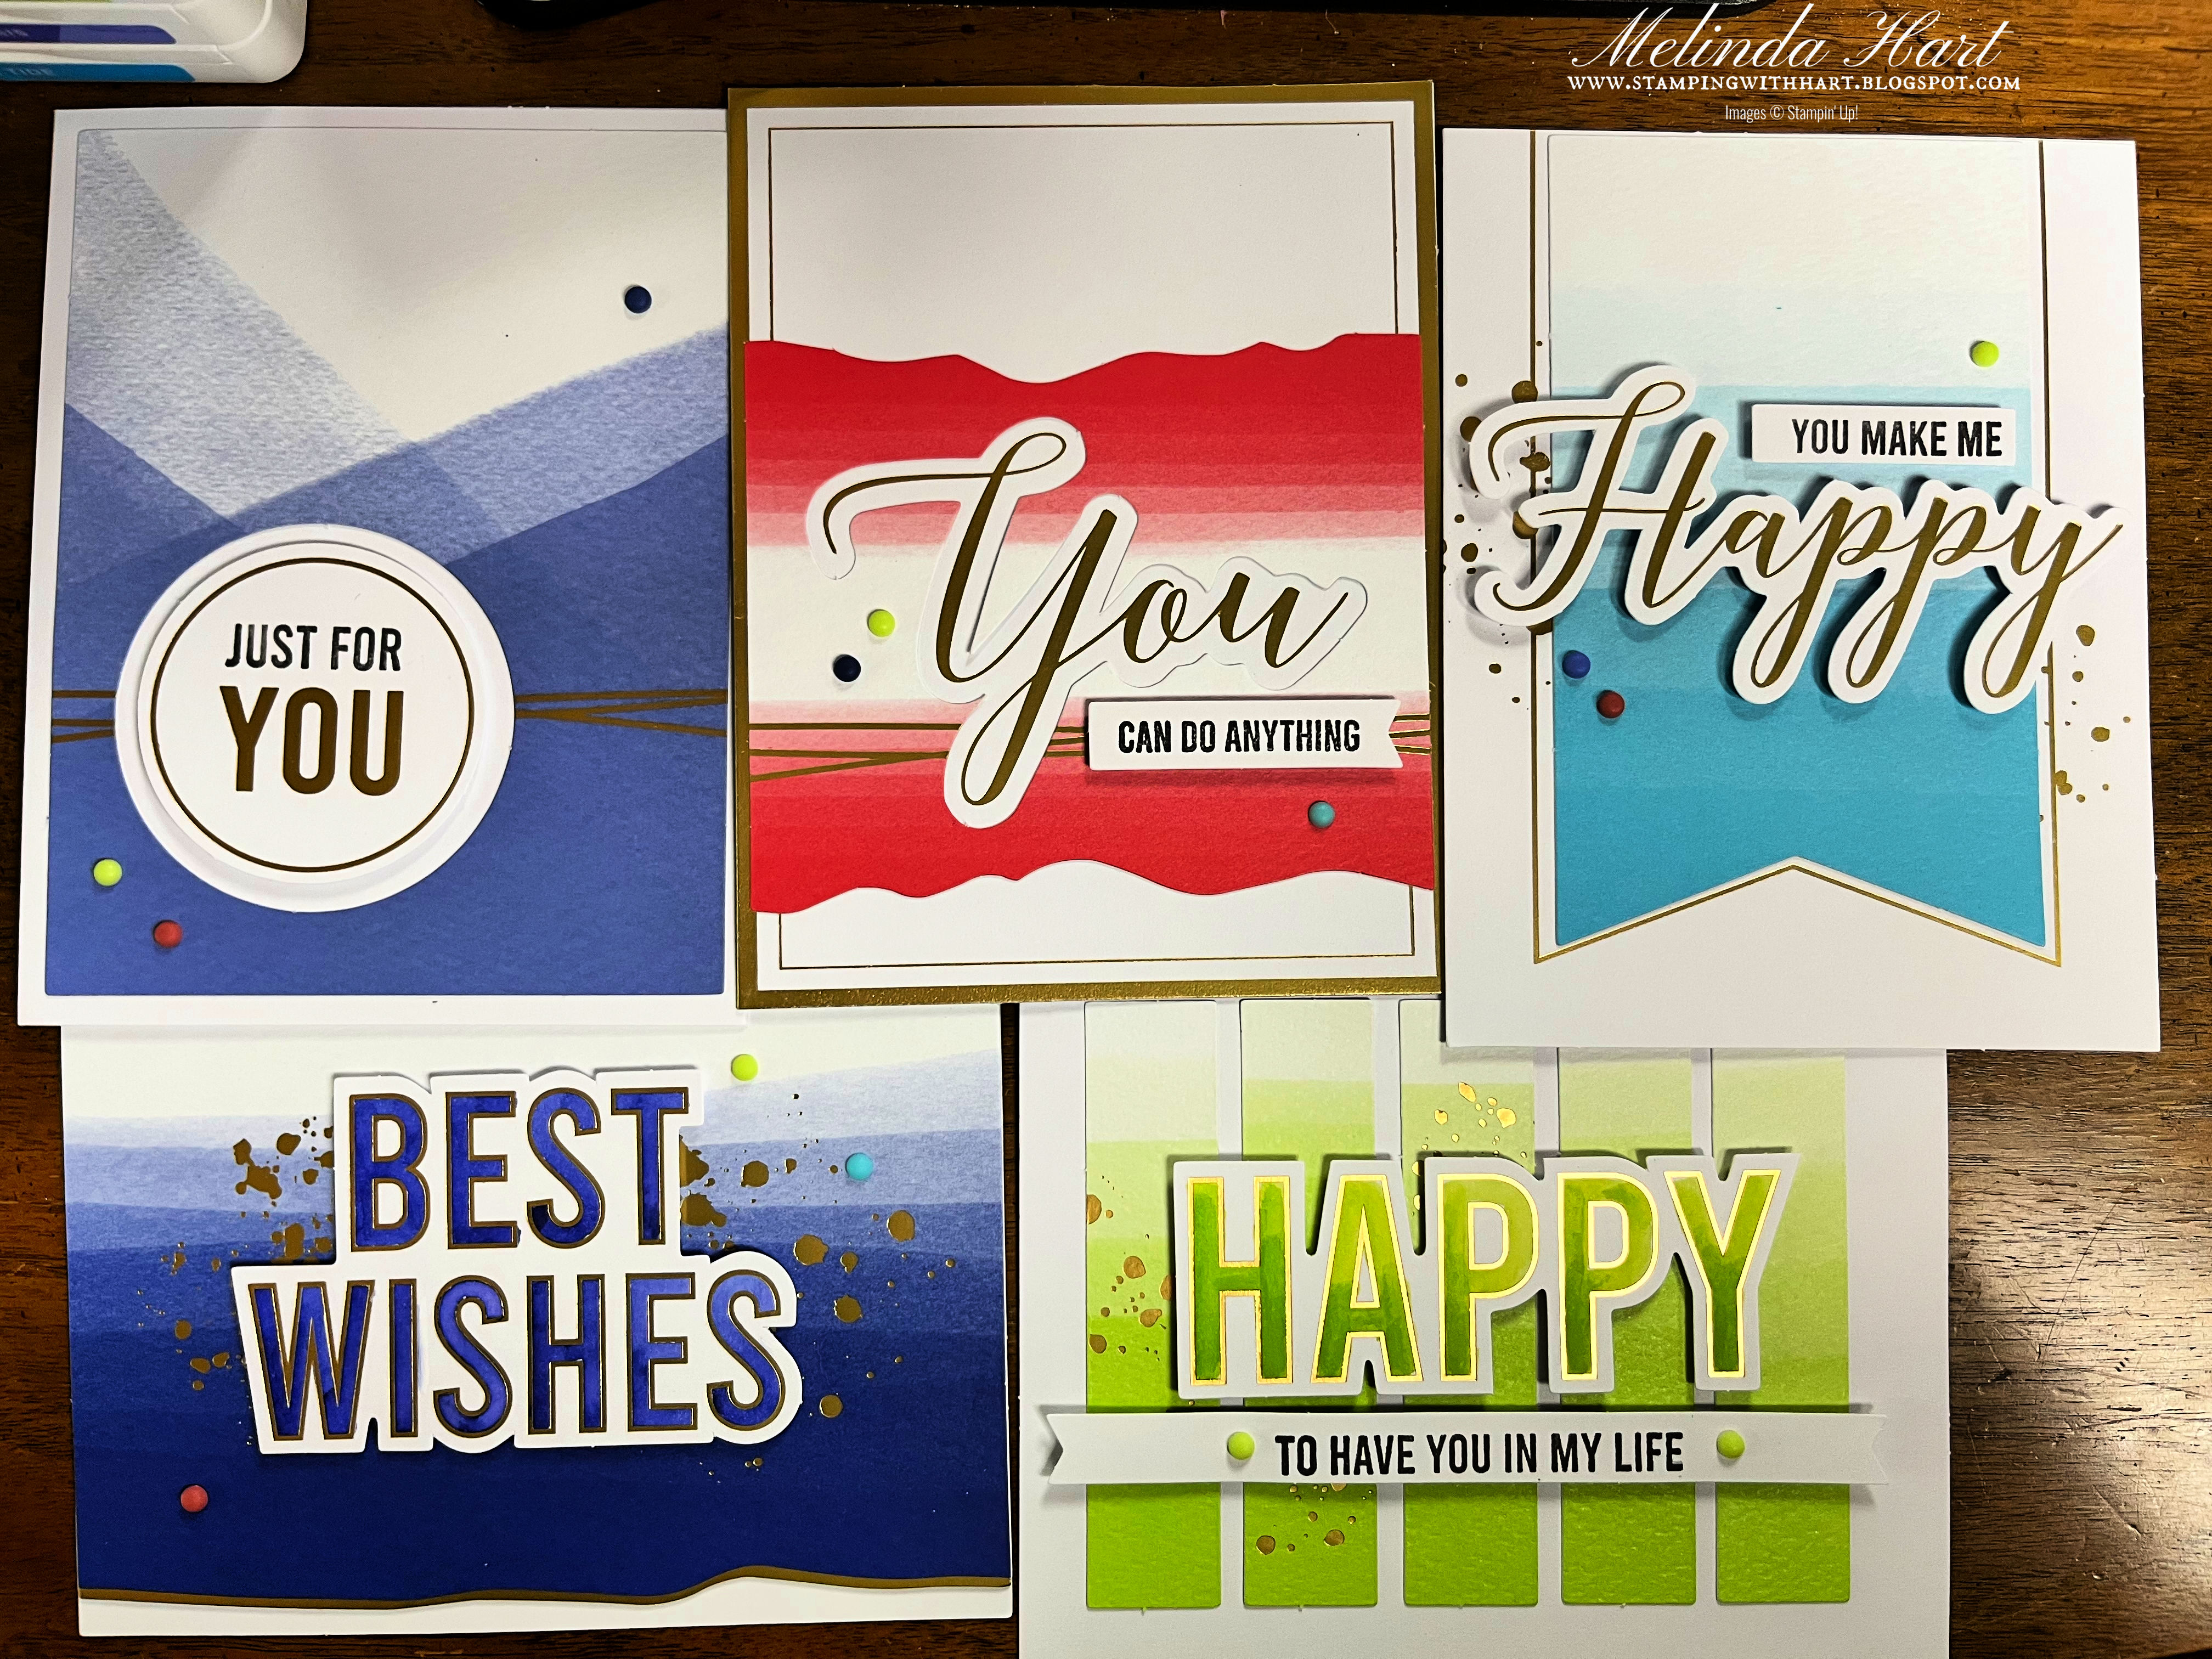
The Cards Designed by the Paper Pumpkin Team
I love the card kit just the way the Paper Pumpkin designed them. Usually when I get a kit I like to adapt it more to my style but this kit is SO EASY and SO STUNNING I really didn't want to change much. I took a closer look at what the designers did and I decided to do complimentary techniques for my alternates because I loved what they chose to do. Here were the elements I loved:
Watercolor Technique
Ombre Look
In Color Shades (and coordinating products)
Clean lines
Focused on the Sentiment as the focal point of the cards
Pops of Gold
Alternate Ideas using the Stamp Set and Envelope Liners
When I see a stamp set that is mostly sentiments or words I immediately want to use the Stamparatus. You can stamp efficiently with this stamping tool so put those sentiments to use. The word "happy" was my favorite and, honestly, a happy kit so that became my focus for this first round of cards.
WHAT YOU NEED FOR THE ALTERNATES:
May Paper Pumpkin Kit
2022-2024 In Color Ink, Cardstock, Embellishments
Water Painters
Thick White Cardstock (or watercolor paper if you have it on hand)
This alternate was inspired by the Kit, an ombre watercolor look using the stamp set inside the May Paper Pumpkin Kit
The main technique used for each of these alternates was an ombre watercolor look inside the stamped HAPPY image. I stamped it in each of the In Colors, stamped over each HAPPY again with VersaMark and heat embossed to create a sort of barrier to hold in the water and prevent bleeding outside of the HAPPY stamped image. I actually used the ink pad and just pressed some ink onto a clear block, dipped the tip of the water painter and colored the words.
In my opinion, the key is to not have the brush be too wet. Just damp enough to transfer the color is what you want. Keep a paper towel or scrap nearby where you can dab off if your brush gets too watery. Dip the tip once, color from the bottom up and the color will get lighter as you move up. There is your ombre look!
2022-2024 In Color Cardstock Sweet Sorbet, Starry Sky, Parakeet Party, Orchid Oasis, Tahitian Tide
Here is the YouTube video for the Bleaching Technique!
I actually have a FREE project sheet you can download here when you sign up for my email list. It includes instructions, measurements and tips. If you are on my email list you've already received the project sheet and do not need to sign up again. You can unsubscribe from the list at any time but I have lots of inspiration in those emails!
This technique is surprisingly easy and fun to watch each cardstock color change differently.
Tahitian Tide with Silver Heat Emboss and Accents
Sweet Sorbet and Gold Heat Emboss and Accents
Starry Sky and White Heat Emboss and Accents
Parakeet Party with Black Heat Emboss and Accents
Orchid Oasis with White Heat Emboss and Silver Accents
DID YOU KNOW:
In May Stampin' Up! has an In Color Starter Kit promotion?! That's right! You can get the cardstock featured in today's blog free when you purchase the Starter Kit as well as the ink pads, designer paper and grid paper.
What do you need to do to sign up for your Starter Kit?
Select $125.00 worth of products (pick what you want)
Get another $66.50 in the 2022-2024 In Color Products automatically added
Pay only $99 (plus tax)
Get FREE Shipping
Enjoy those goodies
Get 20% purchases as a demonstrator
Get first look at new catalogs including holiday coming up soon
Get first option to purchase new products
Want to go back to being a regular customer? Sure, it's totally up to you. The majority of demonstrators sign up for their hobby and discounts. No pressure to sell unless that is something you wish to pursue.
Have any other questions? Email me: stampingwithhart@gmail.com
This offer ends 5/31/2022
Thank you for stopping by the blog and happy crafting!
Card Base: 8 x 9 and score at 4" (Flirty Flamingo Cardstock)
Layer 1: Gold Foil 3-7/8 x 8-7/8"
Layer 2: Hues of Happiness DSP: 3-5/8 x 8-5/8" (Floral Pattern)
Die Cut 1, 2 & 3: 2-1/2" Scalloped Circle from the Layered Circle Dies
Die Cut 4, 5 & 6: Tea Cup die cut in three different cardstock shades: Melon Mambo, Flirty Flamingo, Fresh Freesia
Sentiment Layer: Basic White Cardstock 1 x 3-5/8"
Gold Ribbon: Cut about 10-11 inches
Brushed Brass Butterflies: I used two on the sentiment rectangle
NOTE: This card includes some heat embossing so have your Versa Mark Ink, anti static tool and gold embossing powder with heat tool.
TO MAKE THIS CARD:
This is actually an easy card to make! Just cut and assemble your layers. Die cut your tea cups and layering circle dies.
You will stamp the small bouquet image once with Versa Mark ink on each of the tea cups. Add your gold embossing powder and heat set.
Now, take the rim of the tea cup and either press to your Versa Mark pad to create a line or use a line stamp. Add your gold embossing powder and heat set.
Stamp your sentiment in Versa Mark ink and add gold powder. Heat set.
Assemble the rest of the card and add your ribbon and embellishments. For the ribbon I just tuck the ends behind the DSP layer and glue down. Use dimensionals for the tea cups and sentiment layers.
Hello! This blog is going to be short and sweet or I should say citrus sweet!
Cup of Tea Bundle
I have 6 Tips To Creating Cards with New Stuff. When you purchase new products especially from a new catalog like we just had with 2022-2023 Stampin' Up! Annual Catalog, it can be overwhelming when we look at all of that stuff in the box.
Tip 1: Create a Designer Series Paper SAMPLER
Tip 2: Cut Out Every Die
Tip 3: Put the Dies Back (in an organized way so you can create quickly later)
Tip 4: Put the Stickers on Your New Ink Pads ASAP (Make them easy to use and identify)
Tip 5: Stamp every stamp so you can see and get a feel for the images and how they look
Tip 6: Put the stamps back so they are easy to access next time (and clean them)
The 6 tips are all about getting to know the new products you bought.
You'll be amazed when you start to do this how the ideas start to flow. You might feel drawn to a particular piece of designer paper or a certain stamp image. When I think of the phrase "tea boutique" or "cup of tea" I don't think of Summer necessarily but when I laid out all of the paper and started to see the red and the blues and the yellows and the lemon and the citrus slices, I felt like I could create Summer projects and once my mind made that connection I wanted to create the citrus theme cards you see here.
This is my standard process. I stamp all of the images. I cut all of the dies. I create reference sheets. I cut sampler pieces of the designer paper. I work with any new In Colors and really get a sense of how to make my new set of cards. It is fun and it's so rewarding to use the new products you invested in but, best of all, the recipients will appreciate the cards (and tea) you send them or deliver in person at your next gathering.
How to Make the Citrus Cards
Lime Card
Card Measurements:
Parakeet Party Card Base - 5-1/2 x 8-1/2 and scored at 4-1/4"
Layer 1: Basic White Cardstock 4 x 5-1/4"
Layer 2: Pocket - 2022-2024 In Color DSP (in Parakeet Party stripes) 3 x 6 and scored at 3
Die Cut 1: Vellum Tea Cup
Die Cut 2: Parakeet Party Tea Cup
Tea Cup Tag
Lime Slice Die Cut (Detail and Base Piece) in Parakeet Party Cardstock
2022-2024 In Color Twine in Parakeet Party
I recommend another Basic White Cardstock 4 x 5-1/4" for the inside of your card
This is the standard A2 Card Size. Use Parakeet Party Ink to stamp your lime slices all over the the Basic White layer and then using a sponge dauber just sponge some additional color around the edges. Make a pocket easily with a little tear and tape adhesive. Take the In Color DSP, score in half and seal about half way up the pocket on either side so you can tuck a tea bag in there. I decided this was a bit too narrow so on the lemon card the pocket is a bit wider. This is not meant to hold anything heavy. Adhere your layers. On the Parakeet Party tea cup die cut I sponged some color on to make it look like there was liquid and then layered the vellum over the Parakeet Party cup. I love how it turned out. Use the twine for your teabag tag. I edged the color around the tag too and that's where the sentiment is on this particular card! Put together your lime slice die cut for the finishing touch.
Lemon Card
Card Measurements:
Daffodil Delight Card Base - 5-1/2 x 8-1/2 and scored at 4-1/4"
Layer 1: Basic White Cardstock 4 x 5-1/4"
Layer 2: Basic White 4-1/8 x 5-5/16
Layer 2: Pocket - Tea Boutique DSP (in yellow) 3-3/4 x 5 and scored at 2-1/2"
Die Cut 1: Vellum Tea Cup
Die Cut 2: Daffodil Delight Tea Cup
Tea Cup Mini Tag
Lemon Slice Die Cut in Daffodil Delight
Stitched Rectangle 1-3/4 x 3-1/8"
White Baker's Twine for Teabag Tag
I recommend another Basic White Cardstock 4 x 5-1/4" for the inside of your card
Stamp your lemon slices all over Basic White layer in Daffodil Delight. This DSP you'll cut a little wider and shorter to make your pocket piece to hold your tea bag. I switched to the smaller tea bag tag and stamped it in the coordinating size stamp in Daffodil Delight. With the vellum tea cup, to make it look like it had liquid in it, I pressed it half way onto the ink pad until it was saturated and let dry. Ink on vellum tends not to dry so either you need to heat set or layer it like I did. I backed the vellum tea cup die onto the daffodil delight teacup. Your lemon slice will be just like the lime slice.
Orange Card
Card Measurements:
Pumpkin Pie Card Base - 5-1/2 x 8-1/2 and scored at 4-1/4"
Layer 1: Basic White Cardstock 4 x 5-1/4"
Layer 2: Basic White 4-1/8 x 5-5/16
Layer 2: Pocket - Vellum 3-1/2 x 6 and scored at 3"
Die Cut 1: Basic White Detail Tea Cup Die Cut
Die Cut 2: Pumpkin Pie Tea Cup
Orange Slice Die Cut in Pumpkin Pie
Stitched Rectangle 1-3/4 x 3-1/8"
I recommend another Basic White Cardstock 4 x 5-1/4" for the inside of your card
This version is very similar to the lemon card. I will caution that the vellum pocket wasn't as functional as I'd hoped. Vellum doesn't love glue so you may want to stitch it shut or use brads on either side or go back to a coordinating piece of DSP. My pocket (after making it) kept coming apart so full disclosure there. Measurements are only slightly different. This time I didn't use a teabag tag. I used the fancy die cut layer over the teacup instead (its so beautiful) I tried stamping the orange slices whole but I was a bit impatient and didn't get a perfect line up every time. It was a fun experiment. You can just do half slices of your oranges too to keep it simple. Assemble your card and add your garnish! All done!
I hope you enjoyed today's cards. Before you go, did you know about the In Color Starter Kit Special in May?
This month only, you can get just under $200 in products for $99 (before tax) plus FREE SHIPPING
A typical Starter Kit is $125 in products (that you choose) and only pay $99 ($26 savings)
In May, you also get $66.50 in In Color Products FREE as well and a Paper Pumpkin Kit!
The graphic shows all of the products. Don't miss this offer! It's fantastic!
Ready to purchase your starter kit? Start here: https://www.stampinup.com/join?demoid=2212777
Questions? Email me: stampingwithhart@gmail.com. Only three weeks left on this offer!
This video is my first time using the 2022-2024 In Colors and wow are they are fantastic! There's nothing like seeing them in person! You can check out the replay here:
Before I jump into the tutorial I want to talk about the In Color Starter Kit Special that is happening in May! From May 3 - 31, 2022, Stampin' Up! is offering additional products in the Starter Kit. I wanted to walk you through a "sample" starter kit in the video but let me just also give you a sample idea here. Remember, you customize the kit for what you want. So you can pick $125.00 in products from the new catalog and spend only $99.00, in May you will also get 4 brand new In Color products:
So here is an example of a Starter Kit:
Cup of Tea Bundle: $45.00
Happiness Abounds Bundle: $49.50
Tea Boutique Designer Series Paper: $12.00
Tea Boutique Cards and Envelopes: $10.00
2022-2024 In Color Matte Dots: $8.00
Product total: $124.50
You pay: $99.00 (before tax) and FREE Shipping on the Starter Kit
In May, you ALSO GET:
2022-2024 In Color Ink Pads (all 5 colors, full size)
2022-2024 In Color Cardstock Assorted 8-1/2 x 11
2022-2024 In Color 6 x 6 Designer Series Paper Pack
2022-2024 In Color Grid Paper
Product Total: $66.50
You pay... (no additional cost, included as part of that starter kit value of $99)
You also get:
Free Paper Pumpkin Kit
Value: $23.50
You pay... (no additional cost, included as part of that starter kit value of $99)
That's $214.50 in products and you pay $99.00!!!!
WOW!!!!!!!!!!!
And here's the fun fact, Tea Boutique has all of the new 2022-2024 In Colors in the designer series paper so it coordinates perfectly with that bonus product you'll get in your Starter Kit!
Do you have questions for me? Email me at stampingwithhart@gmail.com or DM me. I'm happy to answer any questions.
Ok, let's get to the tutorial:
I created two cards using Parakeet Party and Starry Sky card bases from the Tea Boutique Cards and Envelopes so you don't have to worry about measurements. Those are already cut and scored and ready to go.
I chose to add layers using the Tea Boutique Designer Series Paper. I will provide measurements for those layers:
Card #1 - Starry Sky
Layer #1 3-1/2 x 4-3/4" Tea Boutique DSP (Cups Pattern with Plants Growing Out of Them)
Layer #2: 3-5/8 x 4-7/8" Tea Boutique DSP (Reverse Side of Cups Pattern in Sweet Sorbet)
Stamp Striped Teacup in Parakeet Party Ink and Die Cut
Stamp the Leafy Plant in Garden Green Ink and Die Cut
Stamp the flowers in Sweet Sorbet
Stamp Sentiment onto tea cup in Starry Sky Ink
Add a layer of Sweet Sorbet DSP to the Back of the Tea Cup and fussy cut
Add Starry Sky In Color Matte Dots to the Plant and Flowers
Card #2 - Parakeet Party Card Base
Layer #1 3-1/2 x 4-3/4" Tea Boutique DSP (Cups Pattern)
Layer #2: 4 x 5-1/4" Tea Boutique DSP (Reverse Side of Cups Pattern in Starry Sky)
Stamp Striped Teacup in Parakeet Party Ink and Die Cut
Stamp Sentiment onto tea cup in Sweet Sorbet Ink
Edge the die cut tea cup with sponge in Parakeet Party Ink so there is contrast w DSP (optional)
Add Parakeet Party In Color Matte Dots to the Cups DSP
The new catalog is live and I decided to do a catalog walkthrough. Grab your favorite beverage and hang out with me if you'd like to flip through the new fun and fabulous products!
Have your heard about the INCREDIBLE STARTER KIT OFFER IN MAY? This month only...
Still have questions? You can email me: stampingwithhart@gmail.com
$26 (typical savings in a Starter Kit) $92.50 (savings in this Starter Kit)!!!! And I'm not even including the value of the free Paper Pumpkin kit
If you are worried about becoming a demonstrator please do not be. Get this savings! Try it out! You do not have to sell. If you want to go back to being a customer you can. I wouldn't miss this if I wasn't already a demonstrator. This is the best value I've seen!