Saturday, September 19, 2020

Wonder of the Season Suite Ideas + Red & Green Foil Sheets & the Dainty ...


It's beginning to look a lot like Christmas in my craft space! At least that is the way it looked this past week as I dove into the Wonder of the Season Suite to create a card and a treat box ornament on my Facebook Lives (Wednesdays and Thursdays).

Wonder of the Season is a MEGA suite! There are so many fabulous products designed and coordinated to create incredible handmade cards, gifts, scrapbook layouts, ornaments and beyond for Christmas 2020 but if you have to narrow it down to a bundle, I primarily used the Wishes and Wonder Bundle and then added other elements of the suite like the designer series paper, embellishments and ribbon.

The Wishes and Wonder Stamp Set, in my opinion, brings out that nostalgic Victorian Christmas feeling which is right up my alley. I love vintage and Victorian everything. Here are some coloring ideas for you if you love the Stampin' Blends Alcohol Marker Combo packs as much as I do! 

Cinnamon Cider, Daffodil Delight, Shaded Spruce, Real Red and Basic Black


If you prefer to just stamp the image and not use any markers, you can see the difference in the look with the Shaded Spruce Stampin' Blends and then using just the Shaded Spruce Classic Stampin' Pad. Both options are stunning!


The main colors are Shaded Spruce and Real Red for the stamping (see pictures below) which are coordinating colors of the Wonder of the Season Suite.


Getting into the die cutting and treat holder elements, I used the tag die to create the treat box and the second photo is of the base of the box in Whisper White Cardstock.

Measurements for the treat box base: 4 1/2 inches in length and 3 inches in width
Score a 1/2 inch in on either side of the base (length wise)
Score at 1 1/4 inch and 3 1/4 inch (width wise)
With your Paper Snips (scissors) mitre the inner score lines
Fold in your tabs and use your adhesive of choice (I used Tear and Tape Adhesive but Stampin' Seal + is also good, you want a stronger adhesive so the box base will hold your little treat!
Adhere the tags you die cut to the open sides of your box base and then decorate!


I kept the decorations on the box simple with a sentiment, a Christmas image (deer or sleigh in this case) ribbon or cord and a touch of glimmer with the Wonderful Gems (part of the suite).

There are two different styles of reindeer you have to choose from in your Wishes and Wonder Bundle. A die cut reindeer which requires no stamping (top) in Cinnamon Cider Cardstock and a stamped image of a reindeer with a coordinating die (bottom) shaded with the Cinnamon Cider Stampin' Blends.


The idea for these boxes was to be able to hang them on a tree! Here they are decorating my birch tree! LOVE THIS LOOK! I'm a huge fan of handmade ornaments and gifts so you will see more of this from me in the future.

And here are the finished products! A simple yet high impact Christmas card and super fun tag treat boxes!

Card Measurements & Instructions:

Cut an 8 1/2 x 11" Whisper White Cardstock in half (4 1/4 inch)
Score at 5 1/2"
Cut your Green Foil Sheet to 4 inches x 5 1/4 inch
Place your Foil Sheet into your Dainty Diamonds 3D Embossing Folder and run through the Stampin' Cut and Emboss Machine (or whatever embossing machine you own) 
Cut the layering strip of Designer Series Paper to 1 1/2" x 4"
Decorative elements can be whatever combination you choose. I went with the die cut reindeer in Cinnamon Cider Cardstock, the adorable North Pole stamp in Real Red, die cut with the coordinating circle frame die and then backed with Gold Foil Sheet die cut with the decorative die also including in the Wishes and Wonder Bundle. I added a little gold cord to the neck of the deer and strung a "Jingle Bell in Gold" onto it. Jingle Bells are available separately. They are not part of the suite. The finishing touch was the Wonderful Gems in Red dotted across the embossing foil sheet.


I hope you enjoyed this week's projects!

Tuesday, September 15, 2020

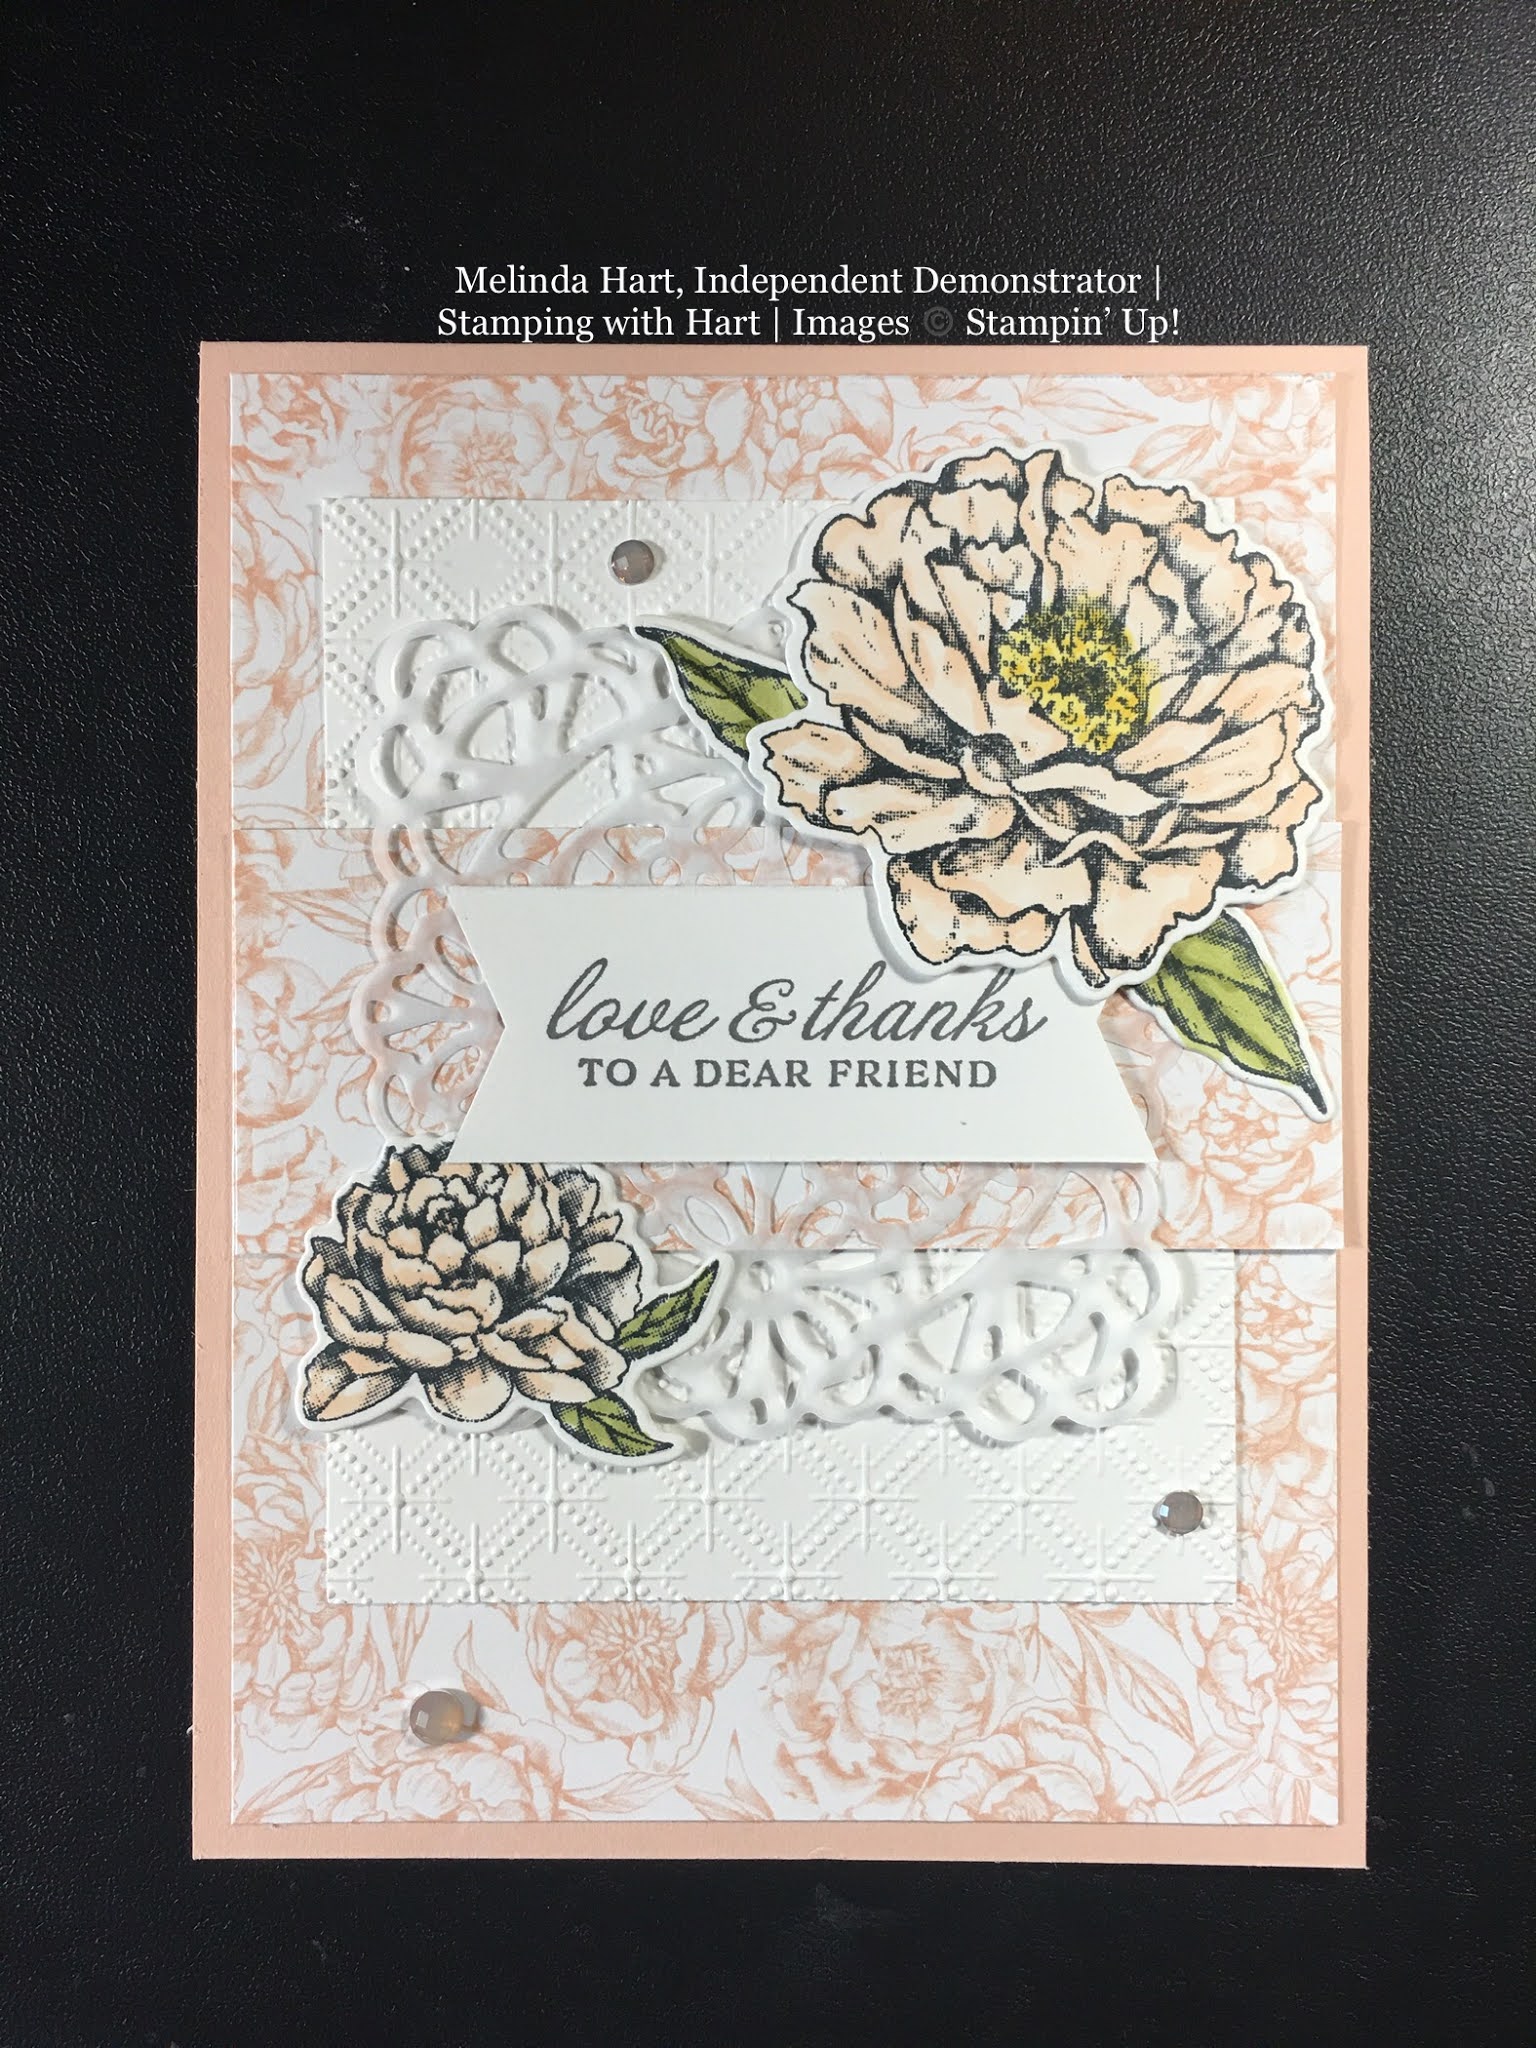
Peony Garden Suite Card Ideas: LOVING THE DAINTY DIAMONDS 3D EMBOSSING F...


I think the Peony Garden Suite is so elegant and beautiful. It makes it very easy to assemble cards!


I was playing around with shading the peonies with the Stampin' Blends! Here are some of the colors I used.


I also experimented with the suite's coordinating colors: Gray Granite, Basic Gray, Petal Pink and added the Memento Tuxedo Black Ink since I was planning to shade with the Stampin' Blends.

Since I did not get a clean stamped image on the middle flower I decided to add the Wink of Stella to see how that looked. It has a very slight grayish shimmer and would be a perfect match for this suite if you decided to add some touches to your cards. Wink of Stella is not included in the suite.


Sunday, September 6, 2020

WOLF IN THE MOONLIGHT - CARD TUTORIAL

 WOLF IN THE MOONLIGHT - CARD TUTORIAL

I love the impact of a silhouette card or a silhouette theme! I knew I wanted to create a card with a wolf but that was not created as a stamp this year so what's a girl to do?

I was eyeing the German Shepherd in the Playful Pets DSP (Designer Series Paper) and thought that could make the perfect wolf with a few minor adjustments.

Here is how I manipulated the image to point the dog's head up and the ears back to create the impression it was a wolf howling at the moon:

FUSSYCUT THE GERMAN SHEPHERD (All images copyright Stampin' Up!)


STEP 1 of 3 for changing the direction of the head:


Separate the Mane, Head and Ears with Paper Snips


STEP 2 of 3:


Separate the ears (as one piece)


STEP 3 of 3:


Separate the head (its the snout we want to take most care with detail but we want the whole head shape)


Ok now with your 3 pieces you are going to position them until your happy with the direction of the head. I turned the head around which is why you are seeing a different pattern on the paper there. I reversed the ears as well. 

Point the snout upwards, the ears downward *you will see that I shortened and rounded off one ear* and tilt the mane outward to give the impression of a fuller, more wolf-like chest.


TAPE TOGETHER your pieces! I just used packing tape, LOL


CREATE A STENCIL with the image you have created and cut it out with your craft knife or Exacto Blade.


TAKE YOUR SPONGE DAUBER and start to fill your stencil image with the ink of your choice once you get your stencil in the position you want on your card. I placed my image so the wolf was head centered in the moon and body at an angle as if he were standing on the edge of a cliff.

NOTE: I used Stampin' Up! ARCHIVAL INK - This is a permanent, dye-based ink. This WILL stain your stamps if you choose to stamp with this ink. I want to mention that because it stained my Mountain Air trees. I do not mind it but if you do then I recommend using a different ink on your stamps.


I used my sponge daubers with Misty Moonlight for the night sky and concentrated the Pacific Point around the Moon mask.


I used my 2 Inch Circle Punch and Post It notes to create my Moon mask. I inked around the mask and removed it prior to stenciling on my wolf image in Archival Basic Black ink.


I had so much fun creating this card. I used the Mountain Air stamp set (specifically the silhouette side of the mountain image - in repeat - to create the cliff the wolf is standing on in Gray Granite ink. 


I used the Stampin' Up! Die Cut and Emboss Machine to cut these detailed trees from the Mountain Air Bundle in Basic Black. (I also tried it in Black Glitter Cardstock on my YouTube tutorial and LOVE that look but it is very laborious to create in specialty cardstock, FYI - I think its worth it!)


Here are the embellishment options I chose for the night sky stars and glimmer. 


Because the Mountain Air Bundle does not include sentiments I borrowed a sentiment from the Hallows Night Magic stamp set - "THERE IS MAGIC IN THIS NIGHT" How perfect for this scene!

This is designed to be an all occasion card. Use whatever sentiment or occasion fits your needs!

I hope you enjoyed this card project! 


How I Created This Adventurous SILHOUETTE Using the Playful Pets DSP & M...

My 2024-2026 In Color Club Starts May 1st! IMPORTANT CHANGES!

Questions? Email me: stampingwithhart@gmail.com