
Saturday, October 31, 2020
Friday, October 23, 2020
Tuesday, October 20, 2020
Wednesday, October 14, 2020
Slimline Halloween Witch Theme Cards: Use Stampin' Blends for Spooky Sha...
Slimline Halloween Witch Theme Cards: Use Stampin' Blends for Spooky Shading!
I had so much fun creating these cards! I had actually done very similar card design back in the Spring, the everyday version we'll say, and I had to revisit the Dressed to Impress Stamp Set for Halloween because we do get ALL DRESSED UP for Halloween, right?
I have a background in cosmetic sales and I guess that comes through in my card designs from time to time. Halloween was a big deal in Cosmetics land with the costumes and the makeup and the fun!
I also have these decorations of witches that are actually very stylish and elegant. I found them at a local market last year and it just struck me that these mythical, eternal figures would have fashion and accessories perfected if they lived for centuries and it gave me the idea for the spooky nail polish collection and the crazy lipstick shades... I've seen it all!
Here is a look at the "making of:"


Here are a few close ups on the details. I added webs using the corner of a stamp in the Hallows Night Magic stamp set...


Foam Adhesive Strips were used for the broom handle. Not a must but a fun dimensional element and the size is right.


Here are the tassels I used which are now discontinued and I really try not to use retired products but I had leftovers and wanted to experiment. If you don't own tassels for crafting you could always create a broom with baker's twine.
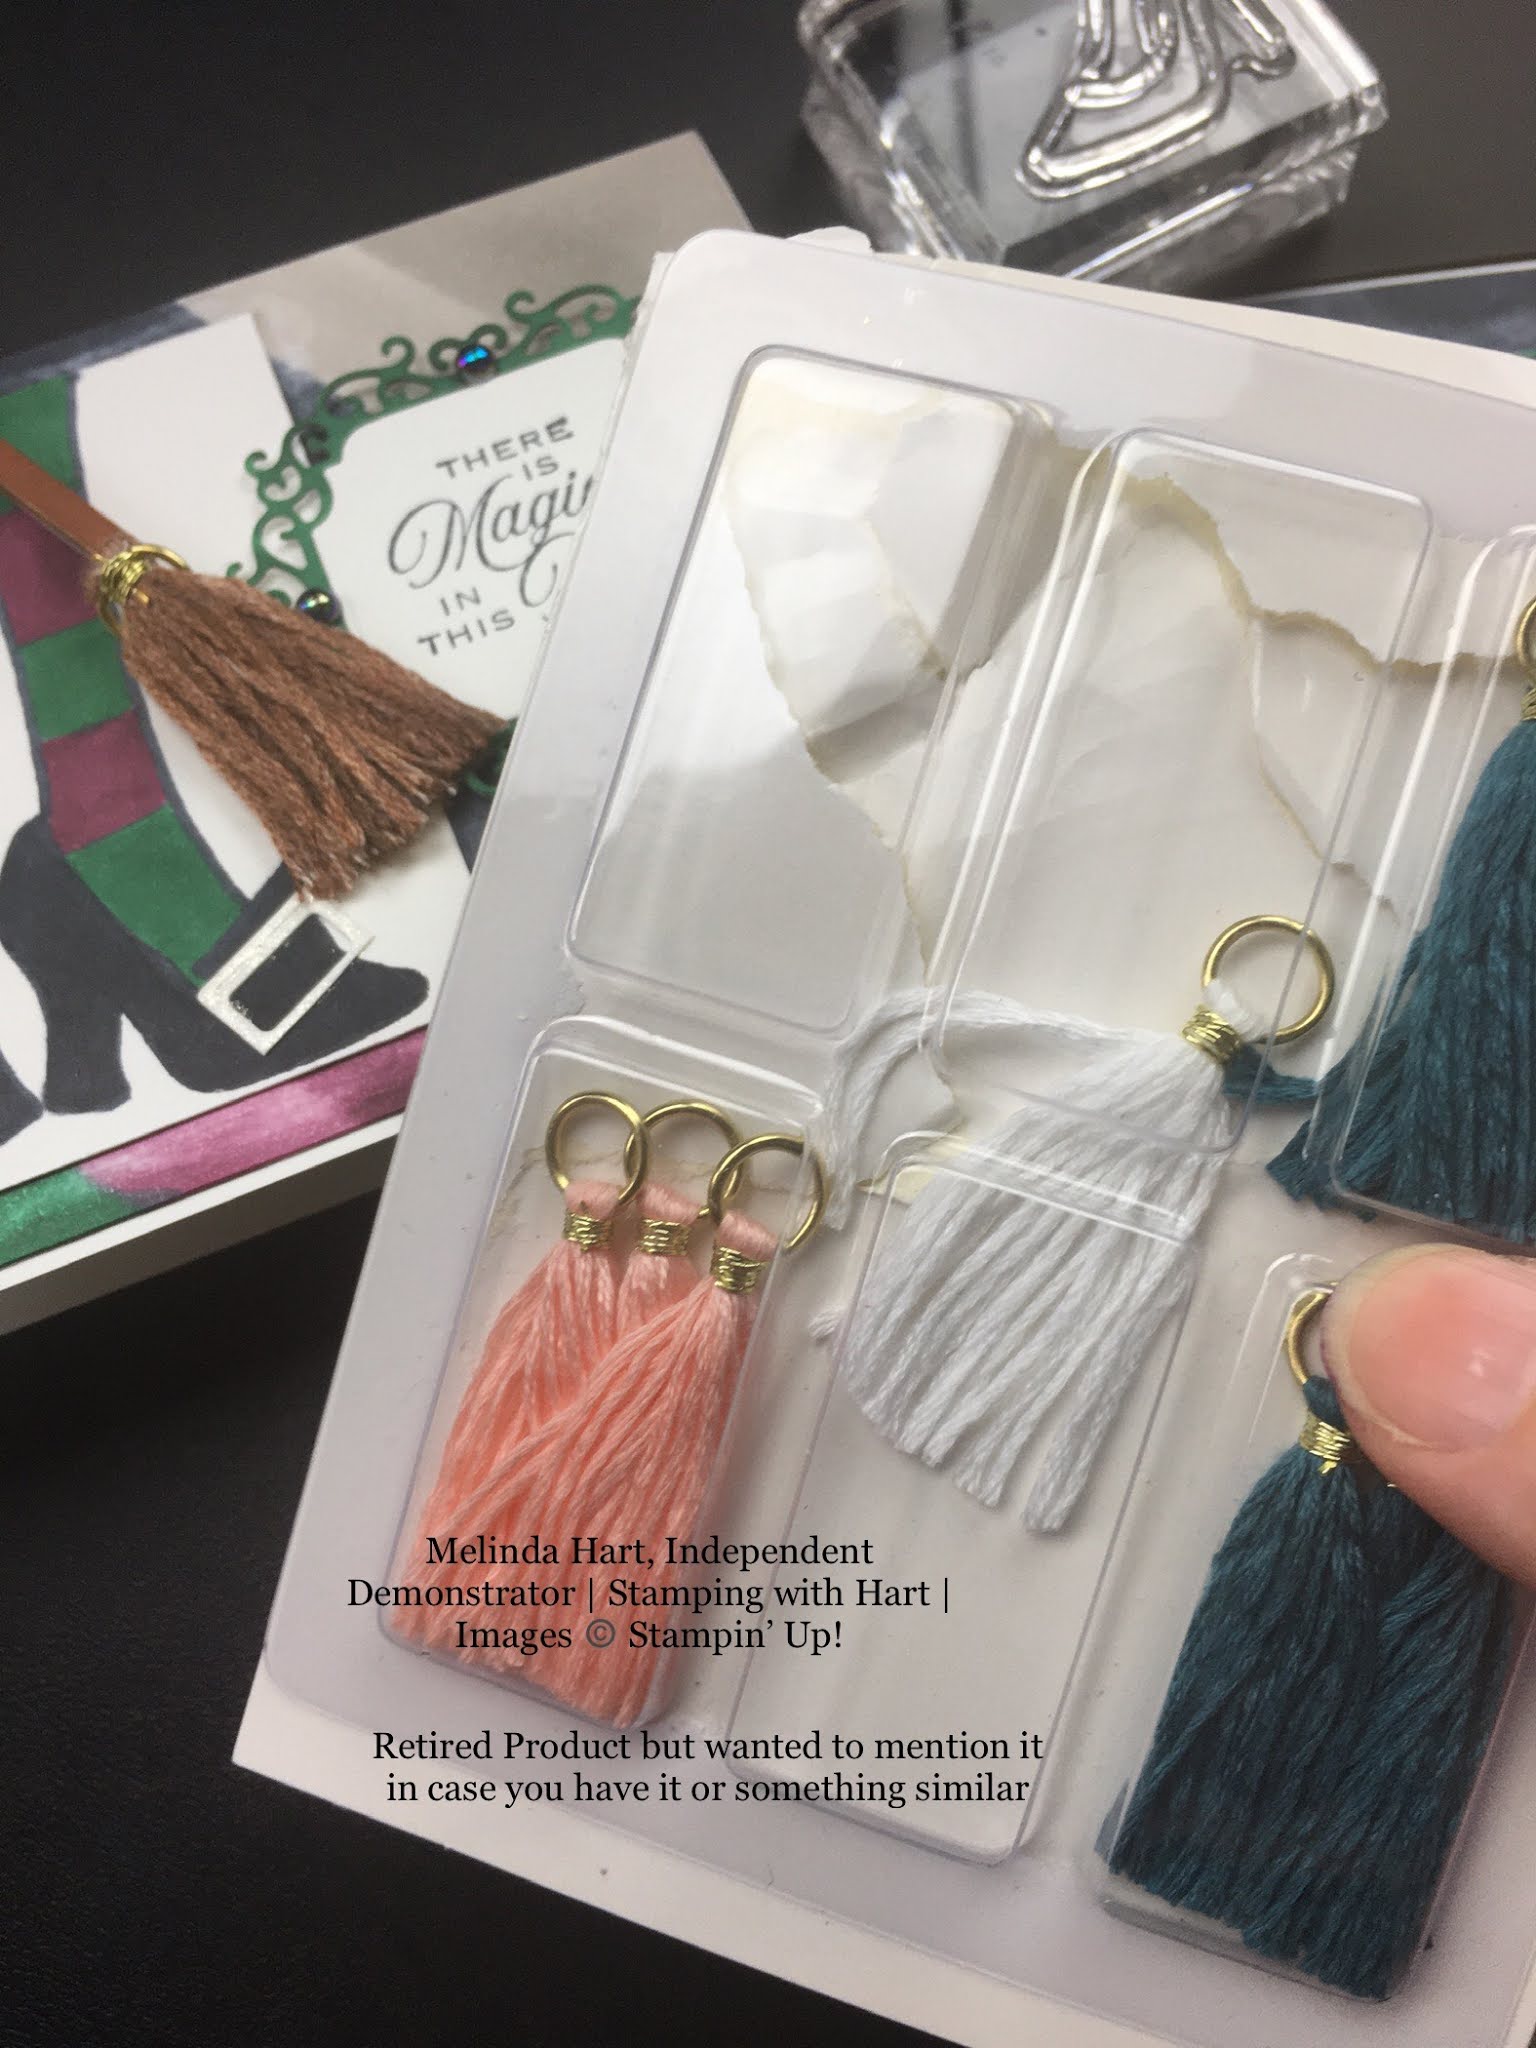
The color combo for the witch's feet card are Basic Black, Shaded Spruce, Rich Razzlebery, Gray Granite in the Stampin' Blends. Love alcohol markers! Memento Tuxedo Black Ink is perfect with Blends because it doesn't smear with alcohol markers.


Stamp the image on the silicone mat and then place the stamped image from the mat to your cardstock. The transfer is easy and it gives new life and ideas to your stamps!


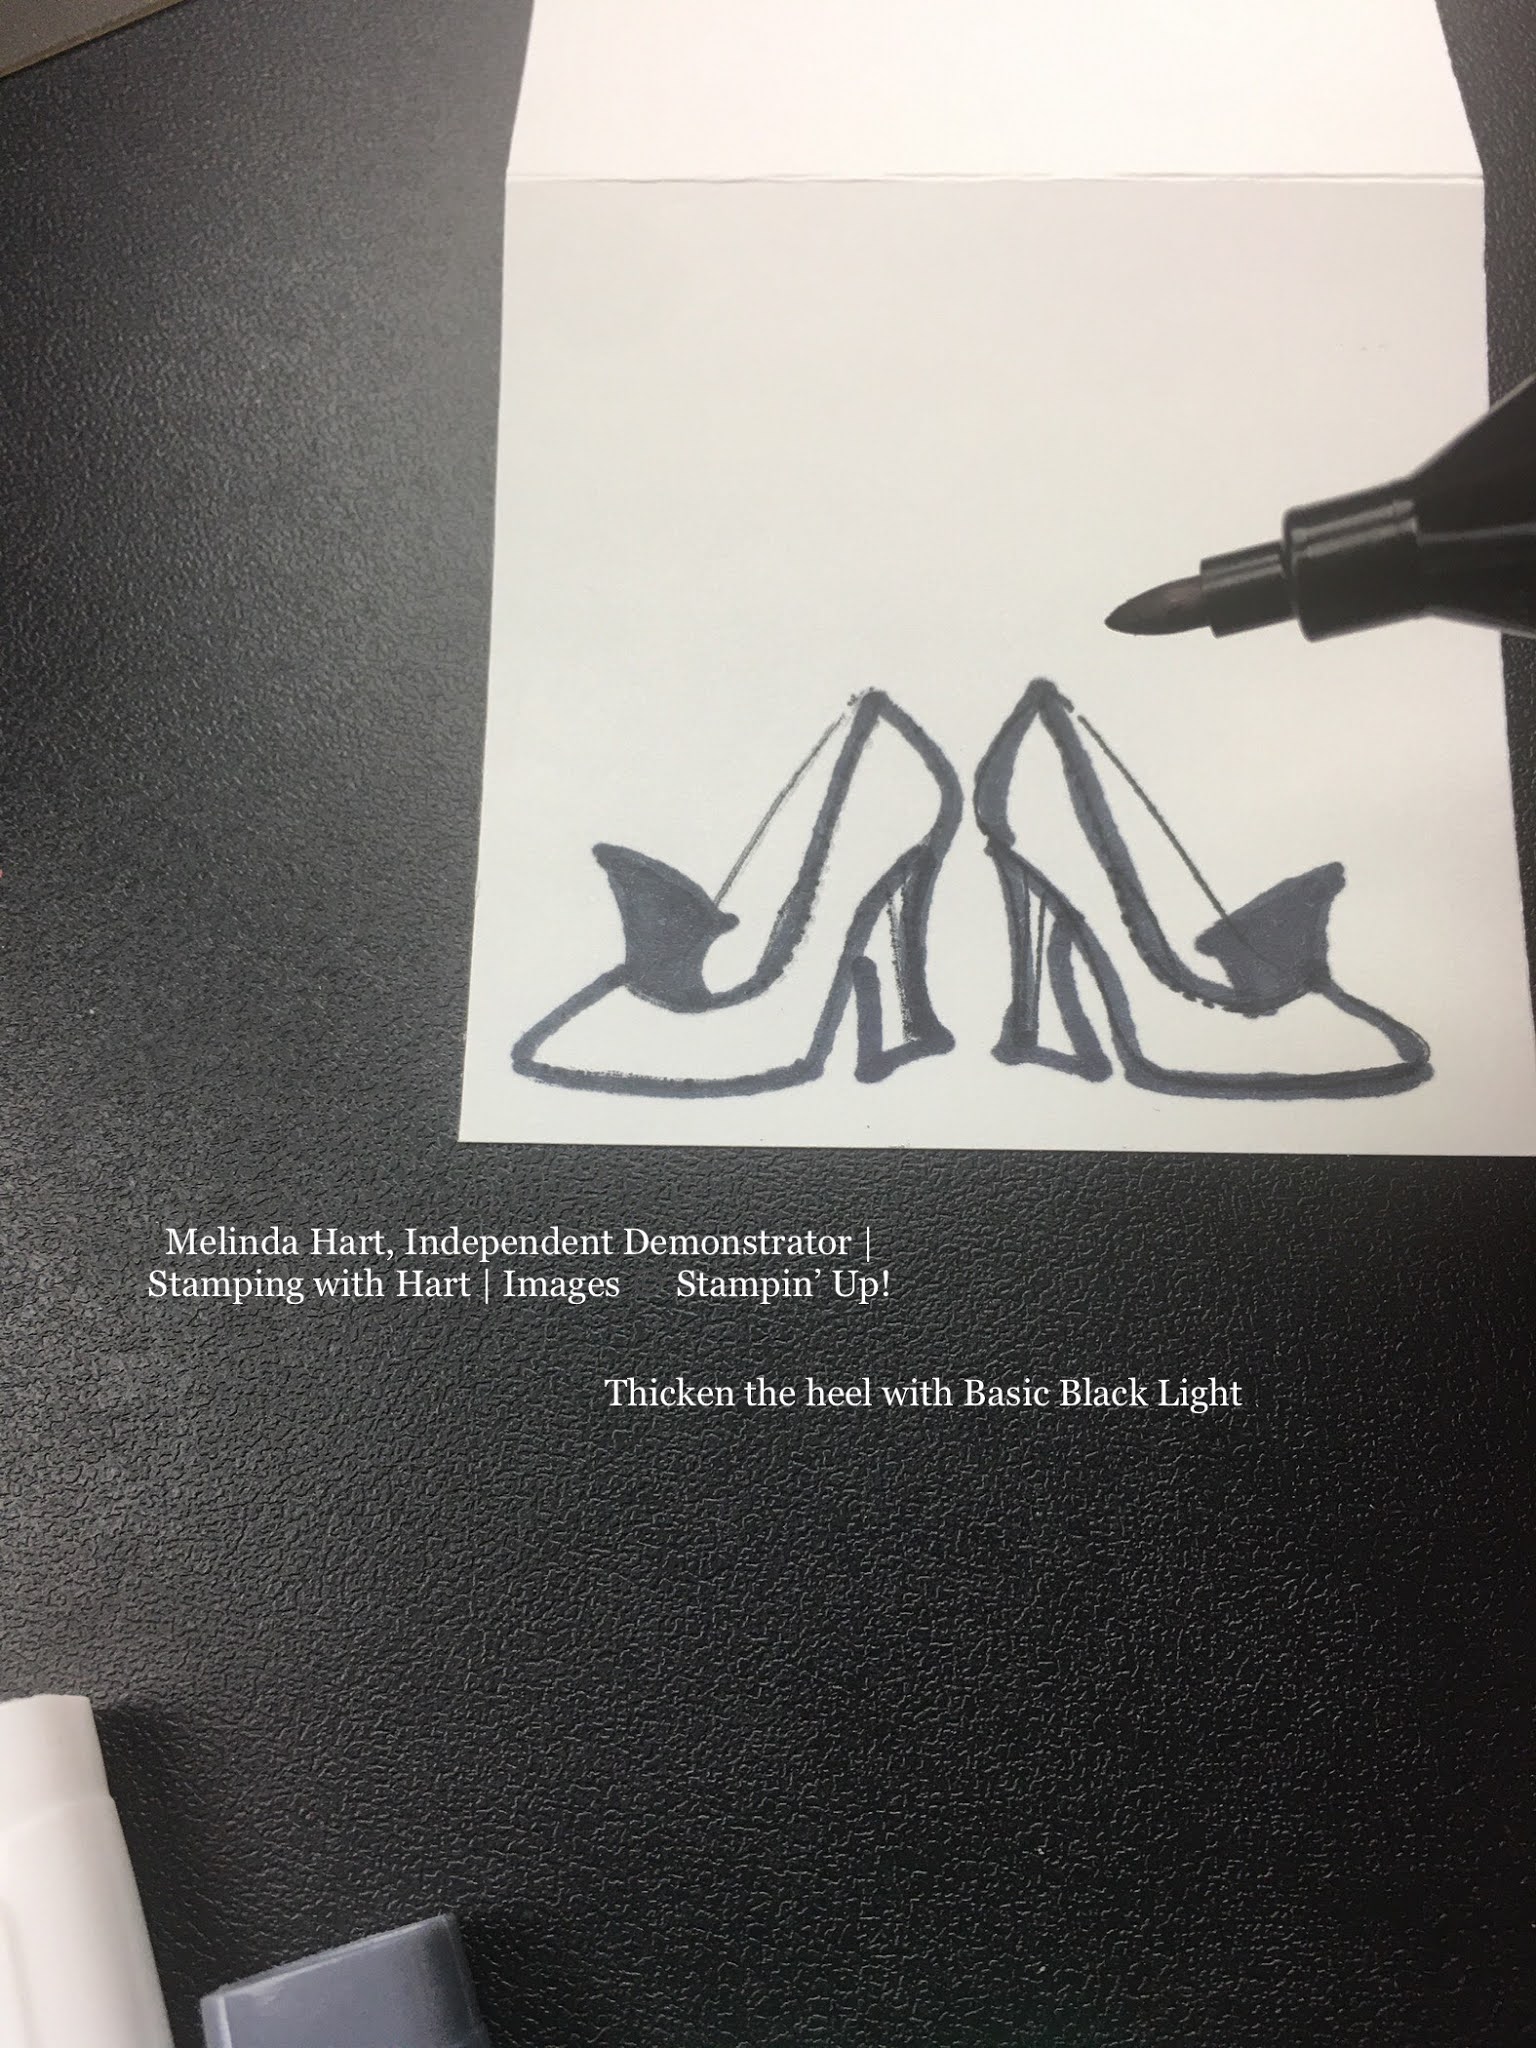
I like Basic Black Light but if you are nervous to free hand lines maybe start with a light gray like smoky slate or gray granite. You can always darken it later. You can even use pencil to sketch it out.
First I added the front flap or "tongue" of the shoe.


This is a piece of the Cinnamon Cider 6x6 Designer Series Paper (Wood Pattern) cut to 1/8" I trimmed to size for the card

I hope you enjoyed this look into the making of these witch theme slimline cards (and bonus note card). You can find links to the products used in the Description of my YouTube video above.
Have a great day!
Wednesday, October 7, 2020
Subscribe to:
Posts (Atom)
Nutcracker Accordion Tri Fold Card: Christmas Cards on a Budget
Christmas in July continues with budget friendly Christmas cards using the Nutcracker Tags Kit and A Stitched Season Designer Series Paper! ...

-
Ever wonder how to use the collage pages in your Designer Series Paper packs? I have an easy fun fold for you to make cards for the men w...
-
UPDATE: The original video published to YouTube was difficult to hear. After several people reached out I decided to re-record the audio a...
-
Here are several alternate card ideas - easy fun fold cards - using the August 2025 Paper Pumpkin Kit: Farmhouse Florals! This kit had TWO ...


