


MEASUREMENTS
- Card Base: 5-1/2 x 8-1/2" Score: 4-1/4"
- Subtles Cardstock Layer: 4 x 5-1/4"
- Basic White Layer: 3-3/4 x 5"
- (1) Subtles Die Cut Layer (Thoughtful Expressions Dies)
- (1) Basic White Die Cut for Sentiment (Thoughtful Expressions Dies)
- (3) Iridescent Pearls Basic Jewels
INSTRUCTIONS
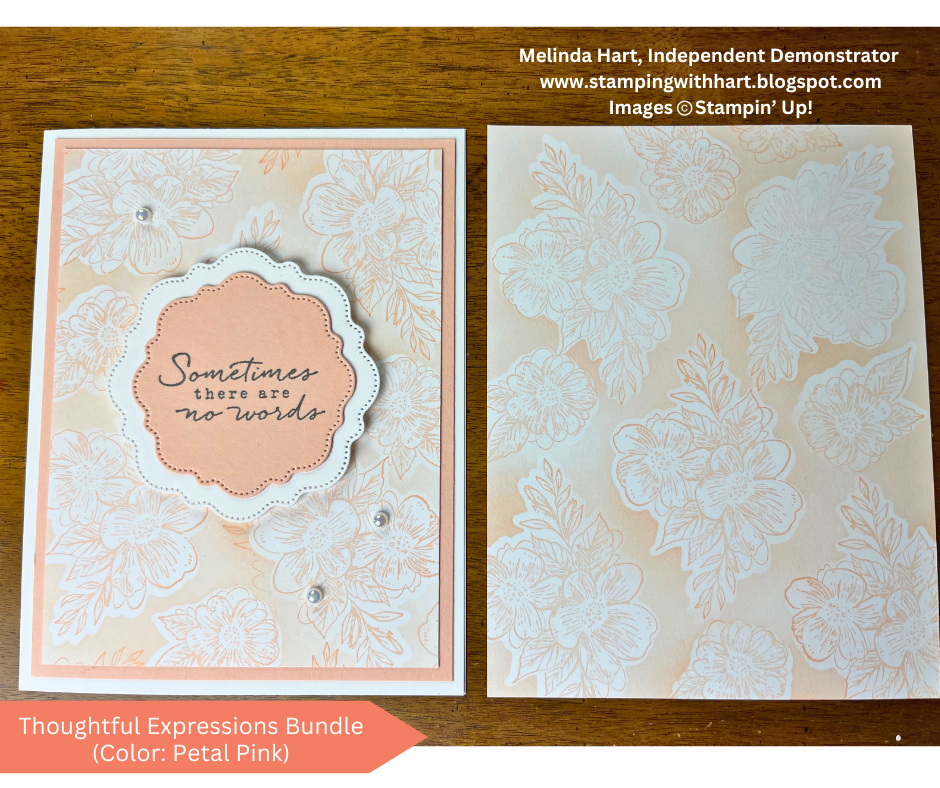
I will be using the Thoughtful Expressions Stamp Set for ALL stamping on today's card projects. I will be using the Subtles Collection - all 10 shades - in the ink and coordinating cardstock for each card. Basic White is the anchor cardstock for all of the card bases and for the colors that are very light, I stamped with Pebbled Path for the greeting.
HOW TO DO THIS STAMPING TECHNIQUE
For this technique I recommend the Stampin' Up! Masking Paper & Blending Brushes. The small blending brush gives more concentrated coverage and the regular blending brush is a little bit softer as it covers a larger area. Either one of these sizes is fine for this technique. I actually used both and loved the way both looked. You can play with this and see which you like best.
The look we are going for is a repeat stamped background but having several of the images stand out by masking the image and adding color around it. It creates a sort of spotlight look that easy to do and really shines on a simple card.
Choose your background stamp. For this example, I will use the humming bird stamp from Thoughtful Expressions Stamp Set.
- Stamp the image on the masking paper
- Die cut it out with the coordinating hummingbird die
- Stamp the bird on your Basic White layer measuring 3-3/4 x 5"
- If it's a larger stamp like the hummingbird I recommend 3 birds to create this look
- Stamp in a sort of triangular pattern
- You want to see most of the bird but it's ok if it is partially off the paper
- Once you've stamped your 3 birds then remove the backing from the masking paper bird and lay it over the stamped image
- NOTE: It doesn't have to be an exact line up just try to cover the image as best you can
- With your Blending Brush, add ink from ink pad in a light circular motion
- Dab off on scrap paper (This is optional but prevents a blot of dark color)
- Starting on the center of the image - on the masking paper - do a circular swirl so that you are getting around the edges of the masking paper. Keep it concentrated to just that masked image. I don't recommend broad coloring or shading
You will repeat these same exact steps with the other two birds. Each time you remove the masking paper from the first image and you can re-use it on the other two as long as you are careful not to rip it. Take your time moving the mask. If the masked image no longer lays flat you need to replace it with another mask. Repeat shading with Blending Brush so the edges of each masked hummingbird have color all around and then remove mask.
You will have some white space remaining around edges. Take the same stamp (or you can choose a different stamp image) and stamp all around the edges with the same color. This really helps to create that overall background look and there's nice contrast for the standout birds you just masked.
Glue the Subtles cardstock layer to the card base. Glue the stamped background next.
Stamp desired greeting from the Thoughtful Expressions stamp set in the Subtles ink (choose your desired color) on the Basic White Die Cut.
With dimensionals add that greeting to the coordinating layer die cut in Subtles shade.
Glue to card. If you happened to make any mistakes stamping your background just pop your greeting/ sentiment die cut over it.
Finish with Iridescent Pearls.


I hope you enjoyed today's stamping technique!
Happy crafting!
P.S. - It is SALE-A-BRATION time! Earn free products during January and February when you shop in increments of $50.00. There are rewards at the $50 and $100 level.
I will include a product list of the items used today. Sale-a-Bration is a great time to stock up on Color Collection products just like the Subtles Collection ink pads, cardstock, ink refills, Stampin' Write Markers and Designer Series Paper.
Sitting down and playing with color collections is also a great way to ensure you are trying different colors you may not use everyday and familiarize yourself with these soft, beautiful colors like feel like Springtime!
Melinda


No comments:
Post a Comment