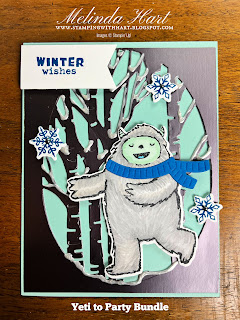
Today I have a couple of fun cards with the Yeti to Party Bundle but I also want to highlight the Perfect Partners promotion that is happening ONLY in the month of September.
Some of our favorite stamp sets have temporarily been paired with coordinating dies. You can save 10% on the bundles or purchase the items separately. The dies will no longer be available after September. Don't miss the Perfect Partners!!!
Yeti to Party Bundle
https://www.stampinup.com/products/yeti-to-party-bundle-english?hostcode=URFSZNGR
Trimming the Tree Bundle
https://www.stampinup.com/products/trimming-the-tree-bundle-english?hostcode=URFSZNGR
This Birthday Piggy Bundle
https://www.stampinup.com/products/this-birthday-piggy-bundle-english?hostcode=URFSZNGR
Waterfall Canyon Bundle
https://www.stampinup.com/products/waterfall-canyon-bundle-english?hostcode=URFSZNGR
Apple Harvest Bundle
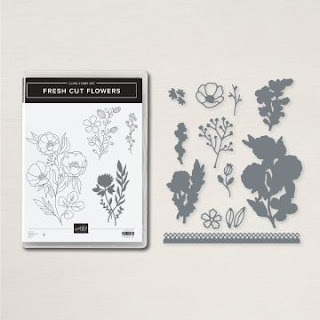
Fresh Cut Flowers Bundle Link
- I recommend three shades, a light, medium and dark alcohol marker in the same color family (in this case Brown/Black for the Bigfoot/ Grays for the Yeti)
- Start with the lightest shade, build with medium and finish with darkest shade
- "Flick" small strokes in the same direction with each color
- When flicking with the lightest color you can make the longer strokes
- When flicking with the medium tone build in the color with slightly smaller strokes
- When flicking in the darkest tone keep this shorter and in the place where we'd have shadow
- Start with one section at a time, for example, start with Yeti's head, then arms, then body, etc. each time
- Stroke upward - do not recommend - stroking downward (this gives a consistent, natural look)
- (Optional) Rotate your image to stay consistent as you build your flicking strokes and colors
- Hold your marker close to the tip and try to stay vertical for this flicking technique (when you hold marker angled to the side it could create thicker strokes and you could lose that detail stroke appearance of hairs)
- Practice makes perfect! The great thing about alcohol markers is that ability to blend and if you go too dark in one spot you can go over it with a lighter color and lighten it back down.
- Basic Black Light (Darkest Hair)
- Soft Suede Dark (Medium Hair)
- Soft Suede Light (Light Hair)
- Ivory (Face)
- Polished Pink Light (Tongue)
- Smoky Slate Gray (Darkest)
- Smoky Slate Light (Medium)
- Gray Granite Light (Light)
- Pool Party Light and Dark (Face, Horns)
- Tahitian Tide Light (Tongue)


No comments:
Post a Comment