
 |
| Today's cards feature the "A Little Cheesy" Stamp Set from Stampin' Up! |
Today's blog is about how to choose a card layout: focal point stamping or stamping a background pattern with the Stamparatus. I created examples for all 4 of the images/ sentiments in the Stamp Set.
If you like puns, cookies, wine, cheese, pudding, being cheesy or all of the above then continue on with this blog post. Lots of pictures and a full product list with my September Host Code already linked. Spend $50 or more with me in the online store in September 2022 (before tax) and I'll send you an embellishment.


 |
| Background Stamping! Gray Granite/ So Saffron Gingham Cottage DSP, Gray Granite Ribbon, Seasonal Adhesive Backed Sequins *white* |

 |
| The Focal Point Version of the card! |
 |
| Here is the Background Stamped Version with the Paper Piecing Technique Sweetest Christmas DSP, Garden Green Ribbon Real Red/ Garden Green |
 |
| Here is the Focal Point version of the Pudding card! Too cute! |

 |
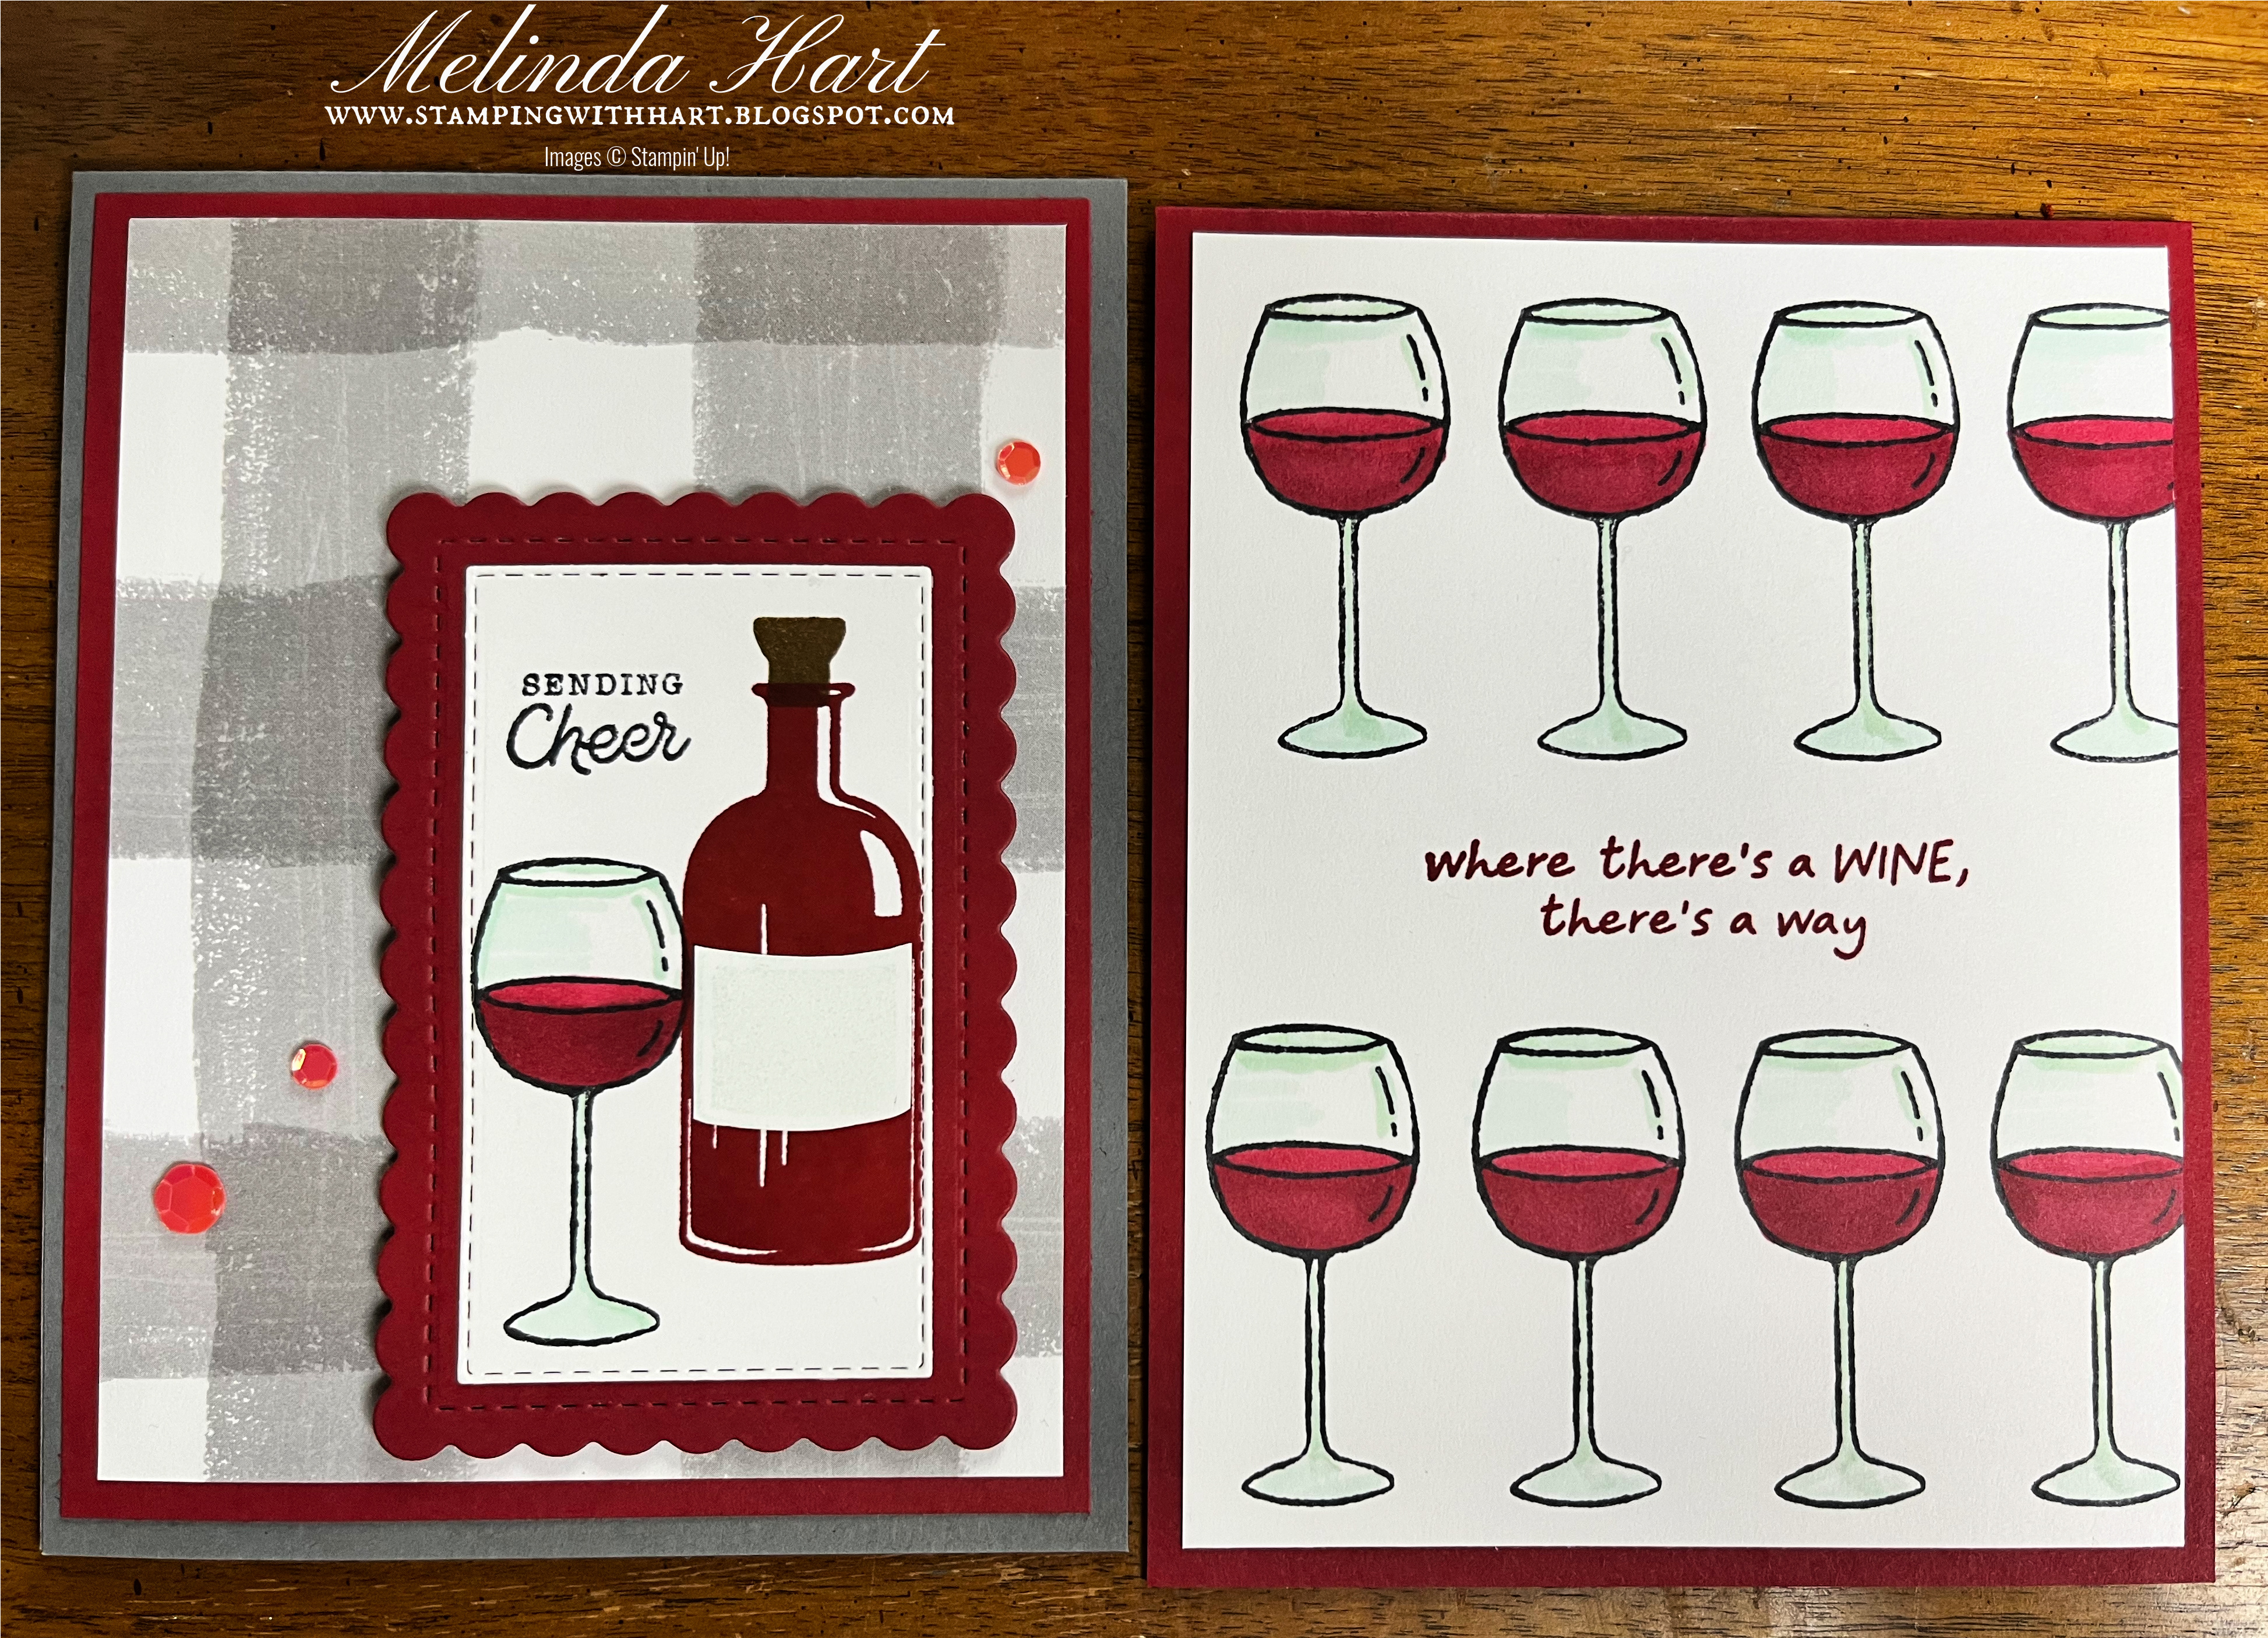
| Focal Point of the Wine Card Also used: Bottled Happiness Stamp Set Gingham Cottage DSP/ Stampin' Blends Basic Gray/ Cherry Cobbler/ Memento Black Ink |
 |
| Here is the Background Version of the Wine Card I also did a horizontal version of this card on Instagram Reels! |
 |
| Focal Point Card (I did background stamp as well) This card double dips. Also used: Love You More Than Dies Crumb Cake, Early Espresso, Very Vanilla |

 |
| This is the sentiment stamped using the Stamparatus Also using the Love You More Than Dies and Nothing's Better Than Stamp Set |
CARD MEASUREMENTS:
For the Background Card:
- Card Base: 5-1/2 x 8-1/2" Score at 4-1/4"
- Basic White Layer: 4 x 5-1/4"
- You choose your favorite die for sentiment or stamp right onto the panel with background stamping
INSTRUCTIONS:
The fun of a stamped background is that you stamp the same image in repeat to create your own pattern. Stamp your desired image using the Stamparatus. Color images or try the Paper Piecing technique. You can see this in my video tutorial as well where I do a little of both.
With paper piecing you stamp the same image as what you used on your background but you stamp it on your favorite DSP patterns, fussy cut it out - in this case the bowl for our pudding card - you will need 6 for the stamped background and just 1 for the Focal Point version of the card.
Add your paper pieces and coloring. I recommend coloring the pudding before you glue on your paper pieces.
For the Focal Point Card:
- Card Base: 5-1/2 x 8-1/2" Score at 4-1/4"
- DSP Layer 1: 4 x 5-1/4"
- DSP Layer 2: 3 x 5-1/4"
- DSP Layer 3: 1 x 5-1/4"
- Your favorite Die Cut (I used the Scalloped Contour Die)
- Cut an inside panel for sentiment if you use dark color cardstock like I did
INSTRUCTIONS:
This is a much more traditional layout. You see these with card sketches all of the time but what I mean by "focal point" is just one stamped image (cheese, wine, etc) and just one stamped sentiment and then the rest is the layers of your favorite Designer Series Paper and so on.
With a stamp set like "A Little Cheesy" I am drawn to do background stamping but I wanted a simpler version too, so you can decide what you like best to create or maybe if you'd like to try something new.
A FEW STAMPARATUS TIPS
- Consider the length and width of your stamp for repeat stamping
- The wine glass, for example, is the same size as 1 notch for your plate so you can stamp this image very close together to create a perfect line because you can stamp "every notch" and move your plate along the hinges on your layer
- If you have a stamp that is wider than the hinge (like the pudding) you need to stamp EVERY OTHER HINGE which means more space between your stamps unless you re-position the stamp each time
- It's ok to have more space! Just take that into consideration for your stamping
- Lastly, I chose to stamp the cheese free hand with a clear block because I knew I would be changing the angle of the cheese with every stamp. With the Stamparatus your angle remains the same unless you reposition between stamping.
I hope you enjoyed today's card ideas! Did you know you can sign up for my email list and learn more about Facebook Live projects, classes, new promotions and products from Stampin' Up! and more? Sign up here: https://lp.constantcontactpages.com/su/GLk7fdL
Here's today's product list for what was used on the cards! Thank you and happy crafting!


No comments:
Post a Comment