
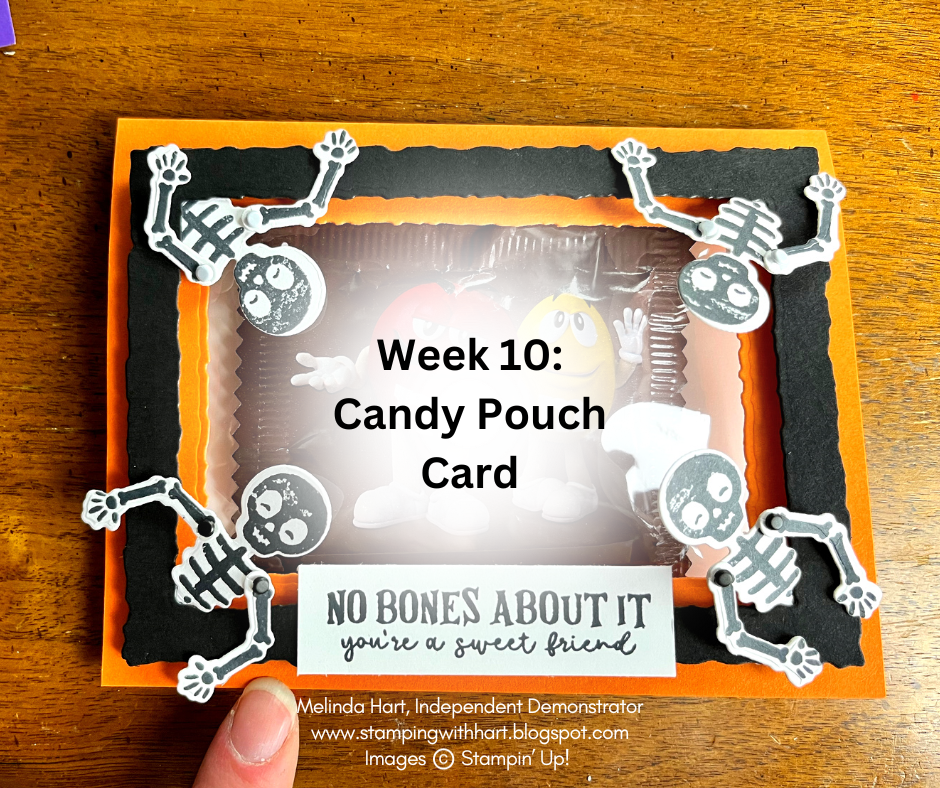

CANDY POUCH WINDOW CARD
- Card Base: 5-1/2 x 8-1/2" Score: 4-1/4" (Pumpkin Pie or Gorgeous Grape Cardstock)
- (1) Deckled Rectangle Frame - Die cut using 3 x 4-3/8" nested inside 3-3/4 x 5 (Basic Black or Pumpkin Pie Cardstock)
- (4) Skeleton Trunk Die Cuts (Basic White Cardstock) Bag of Bones Dies
- (4) Left Arm Die Cuts (Basic White Cardstock) Bag of Bones Dies
- (4) Right Arm Die Cuts (Basic White Cardstock) Bag of Bones Dies
- (8) Round Brads
- (1) Medium Clear Envelope
- (1) Inside Layer : 4 x 5-1/4" (Basic White Cardstock)
- (1) Basic White Rectangle for Sentiment: 3/4 x 2-3/4
NOTE: For the Ghost theme, use 10 Die Cut Ghosts, 1 Die Cut Boo from Tricks & Treats and 6 Die Cut Bats from Bag of Bones.
INSTRUCTIONS
Stamp the skeleton trunks and arms with the Bag of Bones Stamp Set coordinating stamps in Memento Tuxedo Black ink. Stamp "No Bones About it..." greeting on the Basic White rectangle piece in black also. Stamp "Happy Halloween" also in black on the inside panel, center. Set aside.
Take the 2-1/2 x 4" size Deckled Rectangle and cut the center out of the card front. Die cut your frame next using the 3 x 4-3/8" nested inside 3-3/4 x 5 Deckled Rectangle Dies on a piece Basic Black for the skeleton card or Pumpkin Pie Cardstock for the Ghost card.
With your Take Your Pick Tool use the pointed side to poke holes into the shoulder joint of the arm and the trunk. Feed the brad through to connect the pieces so the arm is interactive, Repeat for all skeletons right and left. I folded my brads inward. I recommend adhering them with tape to keep them from moving.
Place Tear and Tape adhesive on the pelvis of each skeleton and then glue behind the 4 corners of the die cut deckled rectangle frame. Position arms where desired.
Place foam adhesive strips around the back of deckled frame and then adhere to card.
Place candy (I recommend something flat-ish) inside the clear envelope with the flap seal on the end with candy.
Place adhesive (I used tear and tape) on back of card insert. Fold the clear envelope so half is tucked in back, add more adhesive to it and then add to inside of card so the candy is center in the window of the card.
I hope you enjoyed today's project!
Happy crafting!
Friendly reminder for Paper Pumpkin friends: You have until November 10, 2023 to subscribe to the Warm Wishes Paper Pumpkin Kit! There is also an add-on available right now called Warm Wishes Cards & Envelopes.
For those of you who've been considering the hobby discount, the 35/35 Starter Kit offer ends October 31, 2023
Remember, You can either choose $125 of products and pay $64.35 (save 35%) or choose $168.75 in products and pay $99 (35% more product)
FREE SHIPPING on the Starter Kit and free admission to the virtual OnStage Stampin' Up! event in November ($77 valuie)
Melinda


No comments:
Post a Comment