


CARD 1
- Card Base: 4-1/4 x 11" score: 5-1/2" (Basic Black)
- (2) Basic White Layer: 4 x 5-1/4" (One outside and one inside the card)
- Plaid DSP: 3-3/4 x 5" (Them Bones DSP)
- Basic Black Strip: 1 x 4"
- Basic White Die Cut (Autumn Leaves Dies)
- (1) Die Cut Cat (Them Bones DSP)
- Copper Clay Textured Ribbon (About 4-1/2")
- (3) Adhesive Backed Sparkle Gems
INSTRUCTIONS
Stamp greeting in Pumpkin Pie ink.. Glue the Basic White pieces to the card front and the other to the inside of the card. Glue the DSP panel to card front next.
Glue the ribbon to the Basic Black strip. Adhere strip to card front. Place center.
Add the die cut with dimensionals to the center of the strip. Glue the cat die cut next to the greeting.
Finish with sparkle gems in gold.

CARD 2
NOTE: If you have a full 12 x 12 sheet you can get 6 cards
- Card Base: 4-1/4 x 11" score: 5-1/2" (Starry Sky Cardstock)
- Basic White Layer 1: 4-1/8 x 5-3/8"
- Graveyard DSP: 4 x 5-1/4"
- Die Cut for Sentiment (Autumn Leaves Dies)
- Pebbled Path Textured Ribbon (About 3-1/2")
- (3) Sparkle Gems in Silver per card
- Basic White Layer: 4 x 5-1/4" (for inside the card)
INSTRUCTIONS
Stamp "Happy Halloween" from Bag of Bones stamp set with Pebbled Path ink.
Glue the Basic White panel (4-1/8 x 5-3/8" size) to card front. Glue the DSP panel next. Cut banner edges into ribbon and glue to card. Place die cut over it with dimensionals. Finish with sparkle gems.
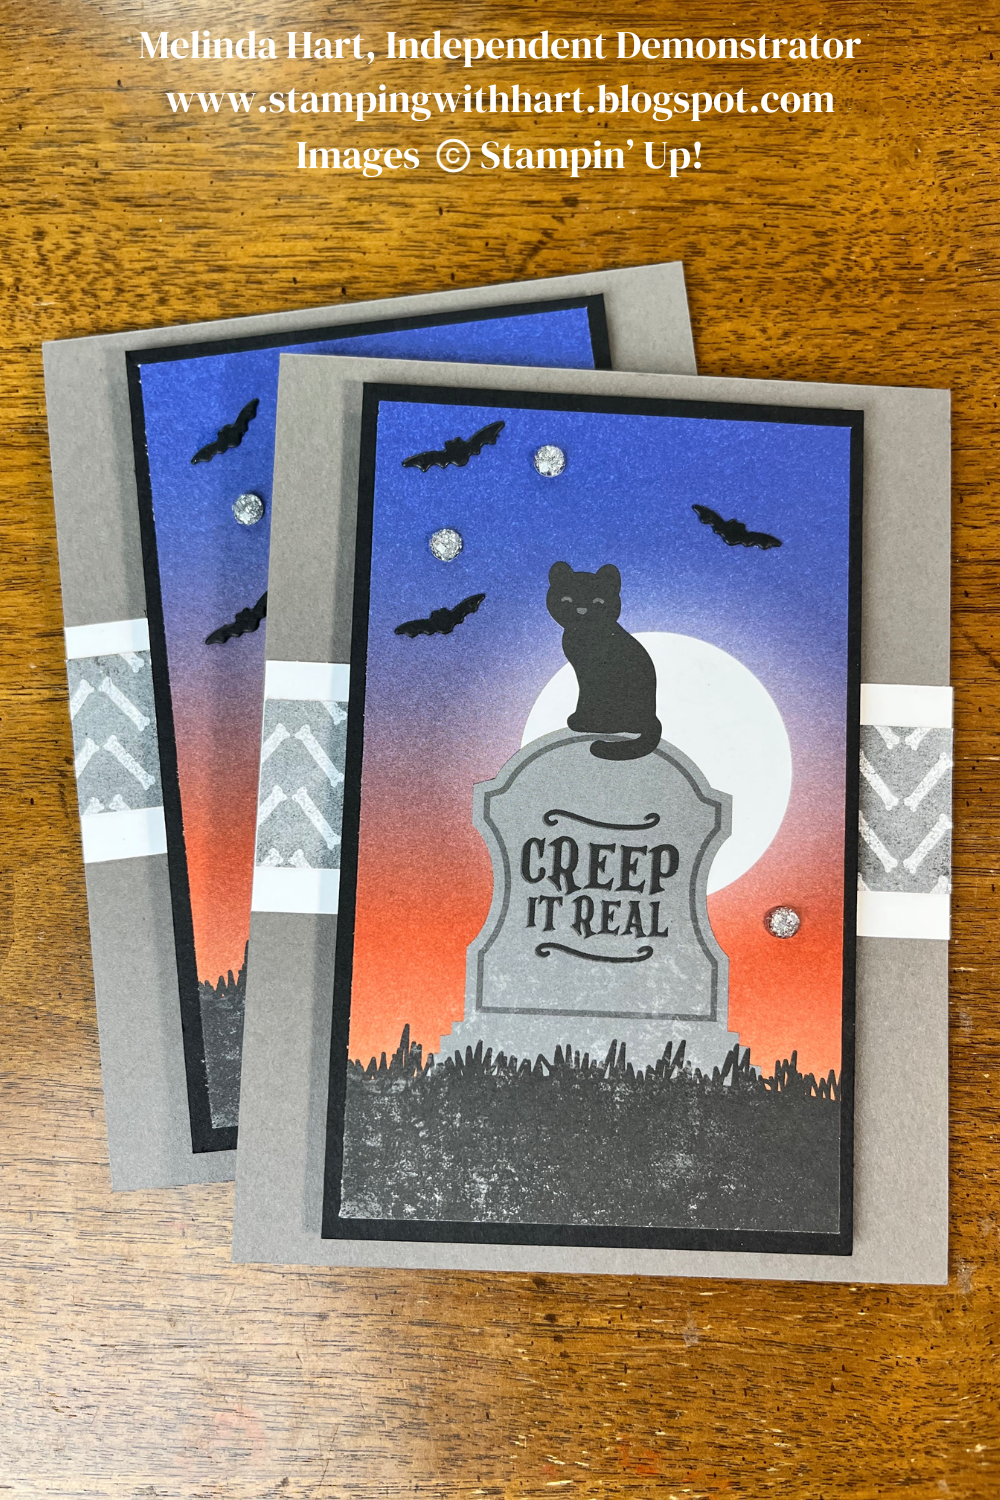
CARD 3
- Card Base: 4-1/4 x 11" score: 5-1/2" (Pebbled Path Cardstock)
- Cat on Grave Stone DSP: 3 x 5" (Them Bones DSP)
- Basic Black Layer: 3-1/4 x 5-1/4"
- Bones Pattern DSP: 1 x 4-1/4"
- Basiic White Strip: 1-1/2 x 4-1/4"
- (3) Die Cut Bats in Basic Black Cardstock (Bag of Bones Dies)
- (3) Sparkle Gems
- Basic White Layer: 4 x 5-1/4" (for inside the card)
INSTRUCTIONS
Glue the Basic White and Bones DSP to the card base. Glue the Cat on Grave stone DSP to the Basic Black panel. Place this panel on dimensionals and add to card. Finish with silver sparkle gems.

CARD 4
- Card Base: 4-1/4 x 11" score: 5-1/2" (Basic Black)
- (2) Basic White Layer: 4 x 5-1/4" (One outside and one inside the card)
- Bones Pattern DSP: 3-3/4 x 5" (Them Bones DSP)
- Night Scene Gate DSP Panel (cut in half) 3 x 4-1/2"
- Basic White Layer: 3-1/4 x 4-3/4"
- Starry Sky Metallic Woven Ribbon (About 15" or enough to wrap around panel twice)
- (1) Die Cut in Basic White (Tricks & Treats Dies)
- (3) Sparkle Gems Silver
INSTRUCTIONS
Stamp Trick or Treat in Pebbled Path ink onto the die cut.
Glue Basic White panels to card front and inside of card. Glue the Bones DSP next.
Glue the scene DSP to the smaller white panel. Wrap the ribbon around it twice so it looks like it's wrapped around the fence. Add this panel to card. Add the die cut to the card (somewhere around the gate) I cut this scene in half so one half has a moon and the other does not. If you don't see a moon, place center. If you don't want to cover the moon, place to the side of fence.
Finish with Sparkle Gems.

CARD 5
- Card Base: 4-1/4 x 11" score: 5-1/2" (Pumpkin Pie Cardstock)
- Spotlight DSP: 3 x 5" (Them Bones DSP)
- Basic White Layer: 3-1/4 x 5-1/4"
- Bat Pattern DSP: 1 x 4-1/4"
- Basiic White Strip: 1-1/2 x 4-1/4"
- Basic Black Strip: 2 x 4-1/4"
- (1) Die Cut Skeleton from Them Bones DSP
- (1) Starry Sky Bakers Twine (2022-2024 Bakers Twine Pack) About 5"
- (1) Basic White Die Cut (Autumn Leaves Dies)
- (3) Sparkle Gems in Black
- Basic White Layer: 4 x 5-1/4" (for inside the card)
INSTRUCTIONS
Stamp Trick or Treat from Tricks & Treats Stamp Set in Pumpkin Pie ink onto the die cut.
Glue the Basic Black strip center on the card first. The Basic White strip next. Glue the twine to the Bats DSP layer and glue to card.
Adhere the Basic White panel to the spotlight panel. Add skeleton with mini dimensionals to the spotlight panel. Adhere this whole pan to card with dimensionals. Tuck die cut next to skeleton lower right. Finish with sparkle gems.

CARD 6
- Card Base: 4-1/4 x 11" score: 5-1/2" (Pumpkin Pie Cardstock)
- Pebbled Path Layer: 4 x 5-1/4"
- (1) Basic White Layer: 4 x 5-1/4" (inside card)
- Tombstone Pattern DSP: 3-3/4 x 5" (Them Bones DSP)
- Basic White Strip: 1-1/4 x 3-3/4"
- (1) Die Cut Ghost (Tricks & Treats Dies)
- (1) Die Cut Headstone (Bag of Bones Dies) 2023-2025 Luster Paper in Pebbled Path
- (3) Adhesive Backed Sparkle Gems in gold
INSTRUCTIONS
Stamp greeting in Pebbled Path ink to the left of the Basic White strip. Happy Halloween is from Bag of Bones Stamp Set. Adhere Pebbled Path panel and then DSP.
Glue Basic White strip down and adhere the Tombstone and Ghost to the right. Place ghost on dimensionals. Finish with sparkle gems.
I hope you enjoyed this week's projects. You can refer to the chart for measurements I used to create cards in bulk with DSP but don't feel like it has to be followed exactly. This is just a guide. For the most part, I was working with partial pieces and scraps but this is a nice chart for simple sizes and layouts.
Happy Crafting!
Melinda


No comments:
Post a Comment