
I have a fun and easy technique blog post and this is one of those where I used a bunch of different stamp sets and dies to compliment and show off what the Masking Paper can do.
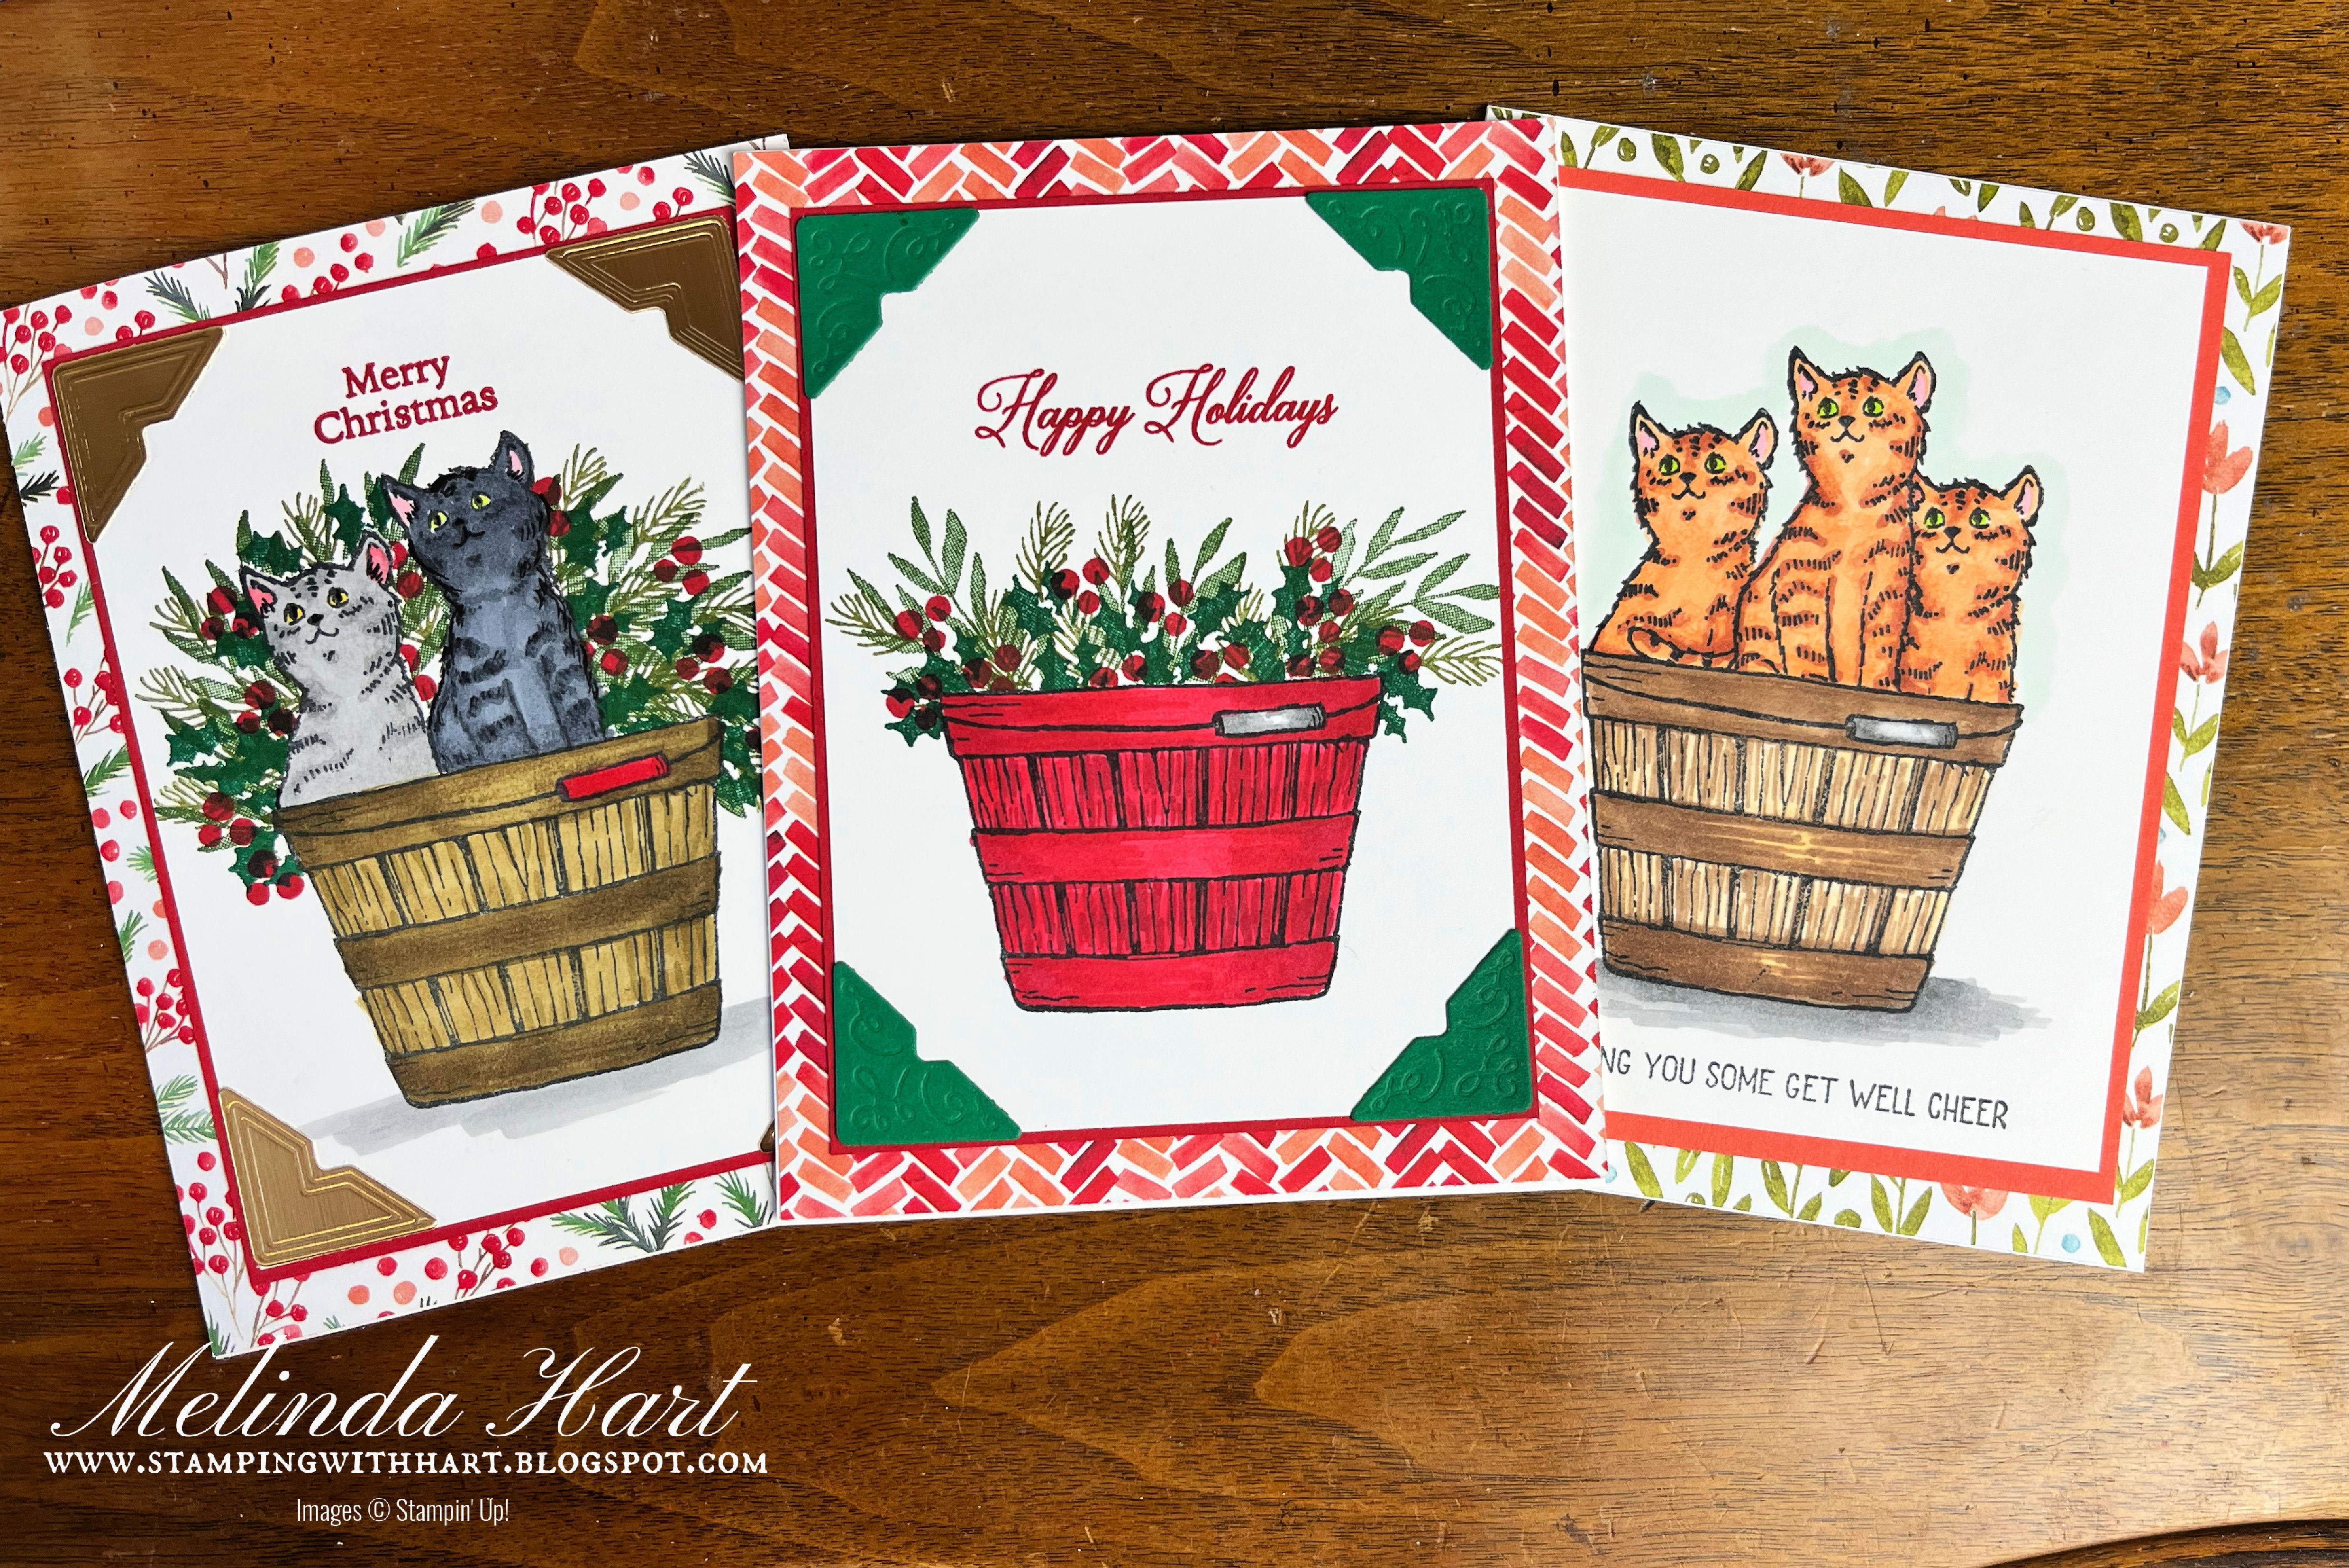 |
| Simple Masking Technique using Stampin' Up! Masking Paper Cheerful Basket Bundle, Cottage Wreath Stamps, Fabulous Frame Dies Coloring: Stampin' Blends |
Before I get into the details of how to make these cards I have an important announcement!
FREE SHIPPING is happening on Thursday, December 15, 2022
- One Day ONLY
- Spend $75 or more before tax to qualify for FREE SHIPPING
- This does not happen often! Stock up and get your craft room together for the New Year
- Treat Yourself and save while you're at it! Christmas Shopping Done!
- Questions? Email: stampingwithhart@gmail.com

 |
| Everyday version of the card Masking the Basket and the Cats! |
 |
| This is a combination of Cheerful Basket and Cottage Wreaths Stamps The Decorative Corners are from the Fabulous Frames Dies |
 |
| This is combining the foliage with the two cats! The idea here was to show how you can build a scene with masking paper. It can be very simple or you can have fun and step it up and add to it! Have fun masking! |
 |
| An example of a "Large Mask" I cut a mask with the Aspen Frame Die and used blending brushes and ink to create a simple, easy to mail (flat) card! |

MEASUREMENTS:
For the Basket Cards:
- Card Base: 5-1/2 x 8-1/2 score 4-1/4"
- Basic White Layer: 3-1/2 x 4-3/4"
- Evening Evergreen or Real Red Layer: 3-5/8 x 4-7/8
- Die Cut Decorate Corners (Brushed Metallic Cardstock)
INSTRUCTIONS:
- The concept of masking is stamping an image (basket) onto your cardstock.
- Stamp the same basket onto the masking paper. Cut out basket.
- I recommend fussy cutting but you can also use dies. The closer the fit the better the look of the finished card.
- Peel off backing and place mask over the stamped image.
- You now stamp your second image (cat) so it appears in the basket. The mask will protect your stamped image from the overlap of the cat's paws or body.
- Remove mask
- Color stamped images in preferred method (I use Stampin' Blends)
3 WAYS TO MASK IN THIS TUTORIAL:
- Use the positive Small/ Standard size mask *stamped image cut out*
- Use the negative image (if you used a die cut, you can turn the negative into a mask where you isolate the image (cat) and color only it protecting your scene around it
- Large Mask - Create a scene with a large mask that covers a layer or even the whole card front for a beautiful Winter scene (Aspen Tree Die)
TIPS
- Bend the masking paper slightly so you can see the crease in the back. Stamp over crease so its easy to remove backing from your masked image.
- For large mask projects, I recommend removing some of the stickiness first by placing the masking paper on your sleeve or pants a few times or your preferred way of making the sticky less intense
- On Small masking I didn't really have an issue with it being too sticky
- Be patient removing mask, don't pull away quickly
- If the masking paper tears when removing its ok. Just work it in sections.
- Save scraps of masking paper for other projects


No comments:
Post a Comment