
Hello! Today's cards are all about doubling up on the branches with the tree and branch stamps in the Beauty of Friendship Stamp Set. This is a masculine and/ or nature theme project.

In addition to the stamp set I also added some stenciling using the stencils from the March 2021 Paper Pumpkin kit (clouds and sun stencils), but if you don't have these exact stencils you could substitute the stencils and/ or stamps you do have with clouds or sunshine. You could also skip this step entirely and just use Designer Series Paper or a light blue or yellow cardstock.
EXPERIMENTING WITH THE COLORS OF THE LEAVES
 |
| Left to Right: Bumblebee & Cajun Craze, Bumblebee & Cajun Craze (stamped off), Bumblebee Only |
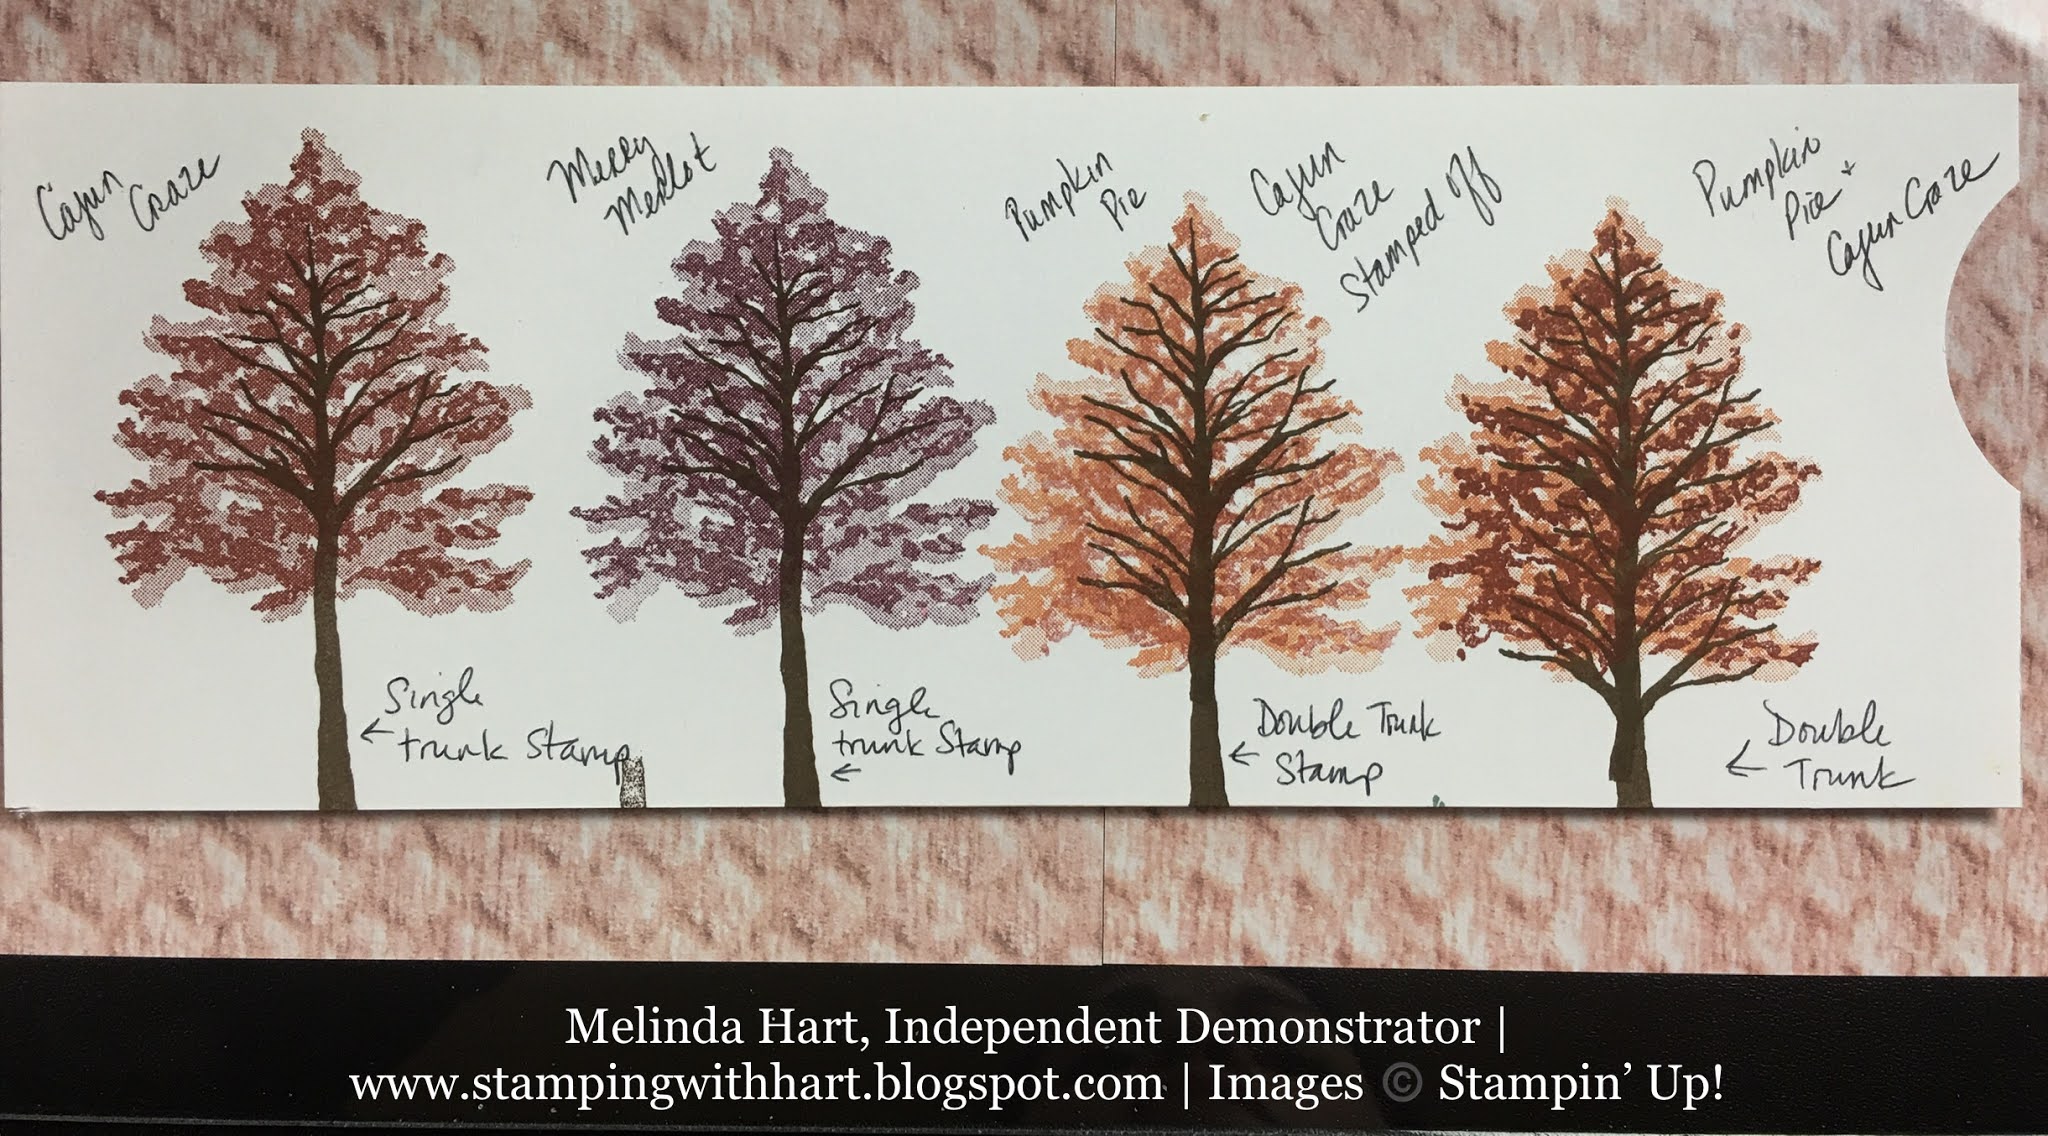 |
| L to R: Cajun Craze, Merry Merlot, Pumpkin Pie & Cajun Craze (stamped off), Pumpkin Pie & Cajun Craze (full color) |
 |
| Top Row: Granny Apple Green, Old Olive and Evening Evergreen Bottom Row: Granny Apple Green, Cherry Cobbler & Granny Apple Green |
 |
| Blackberry Bliss, Blackberry Bliss & Evening Evergreen (Didn't work at all, lol) |
CARD MEASUREMENTS (Both cards have the same measurements):
Card Base: 5 1/2 x 8 1/2, scored at 4 1/4"
Designer Series Paper Layer: 4" x 5 1/4"
Basic White Layer: 3 3/4" x 5"


 Step 1: Stamp full tree in Soft Suede |
| Step 2: Ink ONLY BRANCHES and stamp again, lining up tree trunk, some top branches will overlap |

 Double Branches! Love this for the bigger tree stamp |
| I think this is better alignment for the larger tree. Here is the Granny Apple Green Tree Base layer stamped over the branches to show how the extra branches line up |

Card 2: I chose So Saffron to be the sunshine shade. Take your stencil and blender of choice. I recommend dabbing - not rubbing or circular motion - if you are using this particular stencil from the Paper Pumpkin kit because it moves easily. Dab-sponge your color onto the Basic White layer, again from the top down.
The three trees are stamped at different heights, medium, small and large. Stamp your tree trunks with the varying heights in mind. You will repeat the step of inking only the branches and then adding additional branches to the tree trunk on the left and right trees. The middle tree only needs the branches stamped once.

Granny Apple Green again for the base layer of the trees. For the Medium and Large trees the fill stamp won't cover the whole tree and that's ok. You will ink the fill stamp again and then using the bottom of the fill tree (turn your stamp opposite of how you stamped it before) and stamp again. There will be a little overlap but your detail stamp will mask it.

You will repeat this same process with your fill stamp. Using Evening Evergreen do the same exact pattern and then filling the bottom of medium/ large tree by turning the stamp upside down and stamping again. Re-ink your stamp so it's full color throughout the whole tree. This creates the lush forest look!
Cut Basic White to 1/2" and stamp "I Believe in You" with Granny Apple Green. I finished one edge with the Banners Pick a Punch but you could also cut a simple edge with your Paper Snips. It's about an inch in length but I did not do an exact measurement. See what works for your project.
Adhere your Designer Series Paper (Bark pattern) to your Bumblebee card base. Adhere your Basic White Stamped layer onto the Bark layer. I recommend adding a piece of Basic White to the inside of the card as well.
LIFE UPDATE
If you follow me on Facebook (Stamping with Hart) and you saw the live or the replay there, you heard me announce that I was let go from my full time job on 5/5/2021. It's been a difficult few weeks but this blog and this stamp set helped me get out of the sadness and hurt and back into a positive mindset that focused on beautiful weather, sunshine and lush green trees with sentiments about believing in people and being inspired by others. If you want to know the secret sauce of life as a demonstrator this is it, really. It's inspirational, it's uplifting, it's positive and full of support.
So here's the deal when you purchase the Starter Kit in the month of May:

$155 in product for just $99, plus free shipping! And you choose what you want in your kit!
I'd love to have you join me on this crafty journey! Hope you enjoyed today's project!
Happy Crafting!


No comments:
Post a Comment